Where Can I Find a Free Logo Maker?

In our ever-evolving digital era, branding’s visual elements have never been more vital. A logo, often perceived as a brand’s silent ambassador, wields the power to conjure specific feelings, memories, and perceptions in the beholder’s mind. With the ubiquity of the internet and the trend toward DIY design, even those without a graphic design background can now craft logos that captivate. If the question, “Where can I find a free logo maker?” has crossed your mind, this comprehensive guide will illuminate your path.

1. The Democratization of Design

The realm of digital design has witnessed a paradigm shift. Gone are the days when creating a logo was confined to elite professionals or required pricey software. Today, myriad online platforms cater to varied design needs, bridging the gap between professional design studios and independent brand builders. This shift has made logo creation an accessible endeavor for all, leveling the playing field in a manner previously unimagined.

2. Exploring the Crème de la Crème of Free Logo Makers

The digital landscape brims with options, each promising to transform your vision into a visual marvel. However, some platforms have garnered particular acclaim for their robust features and user-centric approach:

  • Canva: More than just a logo maker, Canva is a comprehensive design toolkit. Its intuitive drag-and-drop interface is complemented by a vast library that spans templates, fonts, and graphics. For those seeking a holistic design solution that seamlessly merges ease with expertise, Canva is a prime contender.
  • Looka: Venturing beyond traditional design paradigms, Looka (previously Logojoy) leverages artificial intelligence’s prowess. It intuitively understands user preferences, offering tailored logo suggestions that evolve and refine with each interaction, fostering a deeply personalized design journey.
  • LogoMakr: Simplicity is often the ultimate sophistication. LogoMakr embodies this philosophy, offering a vast reservoir of graphics through an interface that champions clarity. Its no-fuss approach ensures that users can swiftly navigate the platform, translating their ideas into reality without any unnecessary complexities.
  • Hatchful by Shopify: In an age where e-commerce is booming, Hatchful caters explicitly to online businesses. Recognizing the unique branding needs of e-commerce platforms, Hatchful’s industry-centric templates ensure logos that resonate deeply with targeted audiences.
  • Lunacy from Icons8: A noteworthy addition to this list is Lunacy. This free graphic design software, courtesy of Icons8, offers vector illustrations, photos, and even design assets. While it provides an expansive array of design functionalities beyond just logo creation, its user-friendly tools and expansive asset collection make it an excellent choice for budding logo designers. Plus, its ability to work offline is a boon for those who prefer to design without constant internet connectivity.

3. Understanding the Intricacies of Free Versions

A word of caution for the enthusiastic designer: while these platforms might advertise their services as free, nuances often lurk in the details. High-resolution downloads, access to specific premium elements, or additional customization features might come with a price tag. As such, it’s prudent to peruse each platform with a discerning eye, ensuring that you’re fully aware of any potential limitations or additional costs.

4. The Art and Science of Customization

While the allure of ready-made templates is undeniable, a logo’s true strength lies in its uniqueness. Dive deep into the customization features offered by these platforms. Tinker with hues, reshape design elements, and experiment with typography. The aim should always be to craft a logo that’s not just visually appealing but also a genuine reflection of your brand’s essence and ethos.

Conclusion

In this expansive digital design universe, myriad tools await to transform your brand vision into a tangible logo. From the user-friendly interfaces of Canva and LogoMakr to the AI-driven capabilities of Looka and the comprehensive design suite of Lunacy, there’s a tool for every need. As you embark on this creative journey, remember: while these platforms provide the canvas and brushes, the masterpiece’s creation hinges on your vision and passion.

Also, check our post about star icons.

Exploring the Magic of 3D Scenes: A Comprehensive Guide

In the ever-evolving world of technology and creativity, the concept of 3D scenes has gained significant momentum. Whether you’re a seasoned professional or a curious novice, 3D scenes offer an exciting avenue for artistic expression and problem-solving. This comprehensive guide will delve deep into the world of 3D scenes, exploring their applications, creation process, and their impact on various industries. Join us on this captivating journey as we uncover the magic of 3D scenes and how they are transforming our digital landscape.

What Are 3D Scenes?

3D scenes, in essence, are three-dimensional representations of environments, objects, or scenarios created using computer 3D software and hardware. These digital environments can simulate reality or be entirely fictional, limited only by the creator’s imagination and the capabilities of the tools they use.

At the core of 3D scenes are three primary components: Geometry, Texture, and Lighting.

3d scene

The Applications of 3D Scenes

The applications of 3D scenes are diverse and ever-expanding. They have a significant impact on various industries, offering innovative solutions and enhancing creative expression. Here are some key areas where 3D scenes find extensive use:

Entertainment: In the entertainment industry, 3D scenes are the backbone of video games, movies, and virtual reality experiences. These immersive environments create captivating storytelling platforms that engage audiences worldwide.

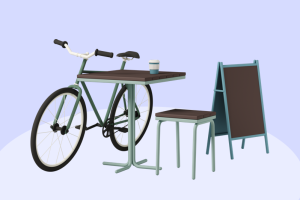
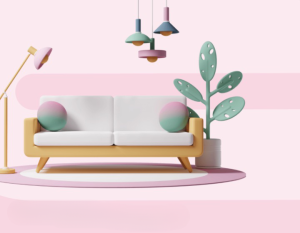
Architecture and Design: Architects and interior designers use 3D scenes to visualize and present their concepts. These digital representations help clients understand and approve designs before construction begins.

Product Design: Manufacturers and product designers employ 3D scenes to prototype and visualize their products. This saves time and resources in the product development process.

Education: 3D scenes have revolutionized education by making complex subjects more understandable. They enable students to explore historical events, dissect biological structures, or even travel through space in a virtual environment.

Healthcare: Medical professionals use 3D scenes for visualizing complex anatomical structures, planning surgeries, and creating custom implants. This technology has transformed patient care and surgical precision.

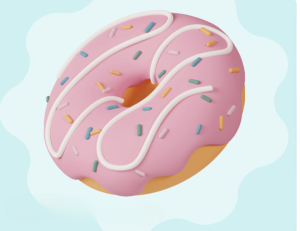
Marketing and Advertising: Marketers use 3D scenes to create eye-catching advertisements and promotional materials. These scenes can bring products to life, making them more appealing to consumers.

Simulation and Training: Industries like aviation and the military rely on 3D scenes for realistic training simulations. Pilots, soldiers, and first responders can practice in safe, controlled virtual environments.

Creating 3D Scenes

Creating 3D scenes can be a challenging but rewarding process. It involves several steps, from conceptualization to rendering. Here’s an overview of the essential steps:

Conceptualization: Start by defining the purpose and scope of your 3D scene. Consider the objects, characters, and environment you want to include. Sketch out your ideas on paper or using digital drawing tools.

Modeling: The modeling phase involves creating the 3D objects that populate your scene. You can use specialized software like Blender, Autodesk Maya, or 3ds Max to craft these objects. Artists can use various techniques, including polygon modeling and sculpting.

Texturing: Textures breathe life into 3D models. Artists apply materials, colors, and patterns to surfaces, making objects appear realistic. High-quality textures are crucial for achieving visual appeal.

Lighting: Proper lighting is essential for realism and atmosphere. Experiment with different lighting setups to achieve the desired mood in your scene. This may include adjusting the position, intensity, and color of light sources.

Animation: If your 3D scene includes dynamic elements, such as characters or moving objects, animation is essential. This involves creating a series of frames or keyframes that bring your scene to life.

Rigging: In cases where characters or creatures need to move realistically, rigging is necessary. This involves creating a skeletal structure and attaching it to the 3D model, allowing for smooth animations.

Rendering: Rendering is the process of generating the final image or animation from your 3D scene. It can be a time-consuming process, but it’s crucial for achieving high-quality visuals. Artists can adjust rendering settings to control the level of detail and realism.

Post-Production: After rendering, post-production involves editing the output to enhance the final result. This can include color correction, adding special effects, and compositing.

Creating 3D scenes requires a combination of technical skill and artistic creativity. It’s essential to practice and continually learn to master the various software tools and techniques available.

The Role of 3D Scenes in Industries

The impact of 3D scenes on industries cannot be overstated. They have revolutionized processes, improved communication, and opened new avenues for innovation. Here’s how 3D scenes have transformed various sectors:

Entertainment Industry: In the gaming and film sectors, 3D scenes have ushered in a new era of realism and immersion. Gamers can explore breathtaking virtual worlds, while filmmakers create stunning visual effects and lifelike characters.

Architecture and Design: Architects and interior designers have moved from traditional blueprints to interactive 3D models. Clients can now take virtual tours of their future homes or offices, making design decisions easier.

Product Design: 3D scenes have streamlined product design and development. Engineers and designers can test and iterate on prototypes in a digital space, reducing the time and cost of physical prototyping.

3d scene

Education: 3D scenes have made learning more engaging and accessible. Students can interact with historical sites, dissect virtual frogs, and explore the cosmos, enhancing their understanding of complex subjects.

Healthcare: In the medical field, 3D scenes are used for surgical planning, patient education, and research. Surgeons can rehearse complex procedures, while patients can see detailed models of their own anatomy.

Marketing and Advertising: 3D scenes have transformed marketing campaigns. Advertisers create stunning visuals, bringing products to life in ways that were previously impossible with traditional photography.

Simulation and Training: Industries like aviation and the military rely on 3D scenes for realistic training simulations. Pilots, soldiers, and first responders can practice in safe, controlled virtual environments.

3D Scenes in the Future

As technology continues to advance, the future of 3D scenes holds exciting possibilities. Here are a few trends and developments to watch for:

Real-Time Rendering: The ability to render 3D scenes in real-time is becoming more accessible. This has implications for gaming, virtual reality, and interactive design, offering smoother and more immersive experiences.

AI and Automation: Artificial intelligence is being integrated into 3D modeling and animation processes, making them more efficient and accessible to a broader range of users.

Augmented Reality (AR) and Virtual Reality (VR): AR and VR technologies are merging with 3D scenes to create even more immersive experiences in fields like education, healthcare, and entertainment.

Cross-Platform Collaboration: Collaboration tools are improving, allowing creators to work on 3D scenes together, regardless of their physical location. This fosters greater teamwork and creativity.

Conclusion

3D scenes are a dynamic and transformative technology with applications that span across various industries. Whether it’s for entertainment, education, design, or healthcare, 3D scenes continue to push the boundaries of what’s possible in the digital realm. As technology evolves and becomes more accessible, we can anticipate even more remarkable developments in the world of 3D scenes.

One of the most exciting prospects on the horizon is the potential for 3D scenes to merge with other emerging technologies, such as artificial intelligence, augmented reality, and virtual reality. These integrations will give rise to entirely new forms of immersive experiences. For instance, imagine being able to explore ancient historical sites in virtual reality, guided by AI that can provide real-time information and context. Or consider a world where architects can design and present their creations using AR, allowing clients to interact with proposed structures as if they were already built.

Cross-platform collaboration is another area that holds great promise. As tools for working on 3D scenes become more sophisticated, creators from around the world can collaborate seamlessly on projects. This level of collaboration will drive innovation and creativity to new heights.

Also, check our post about star icons.

The Evolution of 3D Models: A Comprehensive Guide

Introduction

In the digital age, 3D models have become ubiquitous in various industries, revolutionizing the way we design, create, and visualize objects, spaces, and concepts. From architecture to entertainment, 3D modeling has reshaped the way we interact with the world around us. This article explores the evolution of 3D models, their applications across diverse sectors, and their impact on the future.

I. The Basics of 3D Models

Before delving into the evolution and applications of 3D models, it’s essential to understand the fundamental concept of what 3D models are and how they work.

A. What Are 3D Models?

3D models are digital representations of three-dimensional objects or scenes created using specialized software. These models can be manipulated and viewed from various angles, providing a realistic and immersive experience. They consist of vertices, edges, and faces, which collectively form the 3D structure.

B. How 3D Models Work

3d model of donut

To create a 3D model, designers use software such as Blender, Maya, 3ds Max, or ZBrush. These tools allow them to craft the shape, texture, and appearance of the object in a virtual space. These digital assets can then be rendered into 2D images or used directly in applications and simulations.

II. The Evolution of 3D Models

The evolution of 3D modeling technology has been a fascinating journey, driven by advancements in hardware, software, and the demands of various industries.

A. Early Beginnings

  1. Wireframe Models: The first 3D models were basic wireframe models created in the 1960s. They represented objects with simple lines and points, lacking realism and texture.
  2. Polygonal Models: In the 1970s, polygonal models emerged, featuring surfaces formed by connecting polygons. This development laid the foundation for more complex 3D modeling techniques.

B. Advancements in Hardware

  1. Improved Graphics Cards: The development of advanced graphics cards in the 1990s allowed for smoother rendering and more realistic representations.
  2. The Emergence of 3D Accelerators: The late 1990s saw the introduction of dedicated 3D graphics accelerators, making 3D modeling and rendering significantly faster and more efficient.

C. Software Innovations

  1. NURBS Modeling: Non-uniform rational B-spline (NURBS) modeling, introduced in the 1980s, enabled the creation of smoother and more organic 3D models, which were particularly useful in the automotive and aerospace industries.
  2. Sculpting Software: Software like ZBrush, which allows artists to sculpt digital clay, revolutionized the creation of character models and organic forms.

D. Realistic Rendering

  1. Ray Tracing: The development of ray tracing technology, which simulates the behavior of light and shadows, led to more realistic and visually stunning 3D models.

3d model of coach

  1. Real-Time Rendering: In recent years, real-time rendering technology has evolved, making it possible to render high-quality 3D graphics in video games, simulations, and architectural visualizations.

III. Applications of 3D Models

3D models have permeated various sectors, enhancing creativity, efficiency, and problem-solving across the board.

A. Architecture and Construction

  1. Architectural Visualization: Architects use 3D models to create virtual walkthroughs of buildings and spaces, allowing clients to visualize the final result.
  2. Urban Planning: 3D models are invaluable in urban planning, enabling city officials and developers to assess the impact of new constructions on the existing environment.

B. Entertainment Industry

  1. Animation and Visual Effects: The film and gaming industries rely heavily on 3D models to create lifelike characters and breathtaking environments.
  2. Virtual Reality (VR) and Augmented Reality (AR): 3D models are at the core of immersive VR and AR experiences, from gaming to education.

C. Product Design and Manufacturing

  1. Prototyping: Manufacturers use 3D models to prototype new products, reducing development costs and time.
  2. Customization: 3D printing allows for the creation of customized products using 3D models.

D. Medicine and Healthcare

  1. Medical Imaging: 3D models assist in the visualization and planning of surgeries and the development of prosthetics.
  2. Drug Development: Pharmaceutical companies employ 3D models for drug discovery and molecular modeling.

E. Education

  1. Interactive Learning: Educational institutions use 3D models to enhance the learning experience, particularly in subjects like biology, anatomy, and engineering.
  2. Historical Reconstructions: Archaeologists and historians create 3D models to reconstruct historical sites and artifacts.

F. Gaming

  1. Game Development: 3D models play a crucial role in creating the characters, environments, and objects in video games.
  2. Virtual Worlds: Virtual worlds like Second Life and Minecraft are built on 3D models, allowing users to create and explore their environments.

IV. 3D Models in E-Commerce

The integration of 3D models in e-commerce is reshaping the online shopping experience.

A. Product Visualization

  1. Enhanced Product Display: E-commerce platforms are adopting 3D models to allow customers to view products from all angles, facilitating more informed buying decisions.
  2. Try Before You Buy: In the fashion industry, virtual try-ons and fitting rooms powered by 3D models help customers find the right size and style.

B. Augmented Reality Shopping

  1. AR Shopping Apps: Retailers are launching AR apps that allow customers to place 3D models of products in their real-world environments to assess size and fit.

C. Personalization

  1. Customization: 3D models enable the creation of personalized products, from jewelry to furniture, catering to individual tastes.

V. Future Trends in 3D Modeling

The evolution of 3D modeling is far from over, and several trends are poised to shape its future.

A. Generative Adversarial Networks (GANs)

  1. AI-Generated 3D Models: GANs and machine learning are being harnessed to generate 3D models automatically, opening up new possibilities for rapid content creation.

B. Web-Based 3D Modeling

  1. Browser-Based Tools: Web-based 3D modeling tools are becoming more accessible, allowing collaboration and creation from anywhere with an internet connection.

C. Virtual Reality and Augmented Reality

  1. Expanding VR and AR: The adoption of VR and AR technology will continue to drive the demand for 3D models to create immersive digital experiences.

D. 3D Printing

  1. 3D Printing Advancements: As 3D printing technology evolves, 3D models will play a central role in the production of customized and intricate objects.

VI. Conclusion

The evolution of 3D models from rudimentary wireframes to complex, lifelike representations has transformed industries and everyday life. These digital assets have become indispensable tools for architects, designers, educators, and more. With emerging technologies like AI, web-based modeling, and 3D printing, the future of 3D modeling promises even more innovation and widespread applications. As 3D models continue to shape the digital landscape, it’s crucial to stay updated on the latest trends and developments in this dynamic field.

In the ever-evolving landscape of digital technology, 3D models have undergone a remarkable journey, expanding their influence across various industries and everyday life. From their early days as simple wireframes to their current status as complex, photorealistic representations, 3D models have come a long way.

These versatile digital assets have significantly impacted fields such as architecture, entertainment, education, healthcare, e-commerce, and many more. They have enabled architects to offer immersive visualizations, empowered filmmakers to craft stunning visual effects, and transformed education by providing interactive learning experiences.

As we gaze into the future, the trajectory of 3D modeling looks even more promising. The convergence of technology, like Generative Adversarial Networks (GANs) and machine learning, will lead to more efficient and automatic 3D model generation. The continued expansion of virtual reality and augmented reality will create new opportunities for immersive experiences, while 3D printing advancements will usher in an era of customized, intricate objects that were once inconceivable.

Staying informed about the latest trends and developments in 3D modeling is crucial for professionals in various fields. As the demand for 3D models continues to rise, this digital evolution is poised to impact industries in unprecedented ways. It’s an exciting time for 3D modeling, with innovation being the cornerstone of its journey into the future. The path ahead is certain to bring forth groundbreaking applications and shape industries in unforeseen directions, cementing the role of 3D models as the driving force behind the digital transformation of our world.

Also, check our post about star icons.

Unleashing Creativity: Exploring the Best AI Photo Editors with HeyPhoto

In an era dominated by visual content, photo editing has become an indispensable part of our lives. Whether you’re a professional photographer, an influencer, or just an avid smartphone photographer, the right photo editing tools can elevate your images to new heights. With the advent of artificial intelligence (AI), the world of photo editing has witnessed a significant transformation. AI-powered photo editors have revolutionized the way we edit and enhance our photos. In this article, we’ll delve into the world of the “best AI photo editors,” and we’ll introduce you to HeyPhoto as a powerful tool in this domain.

The Rise of AI in Photo Editing

Artificial intelligence has seeped into various facets of our daily lives, and photo editing is no exception. AI-powered photo editors utilize machine learning algorithms to automatically enhance and retouch images. This technology can identify and correct imperfections, adjust colors, and even apply creative effects, all with remarkable precision and speed. What sets these AI photo editors apart is their ability to simplify the editing process, making it accessible to everyone, regardless of their level of expertise.

ai photo editor

The Best AI Photo Editors

  1. Adobe Photoshop AI:
    • Adobe Photoshop, the iconic photo editing software, has integrated AI capabilities into its platform. With features like “Enhance Details” and “Super Resolution,” it uses AI to upscale images without compromising quality. Additionally, its “Neural Filters” offer an array of creative options, from changing facial expressions to adding artistic filters.
  2. Luminar AI:
    • Luminar AI is a comprehensive AI-powered photo editing tool designed to simplify complex editing tasks. It comes with features like “AI Sky Replacement” and “AI Augmented Sky,” which allow users to easily change the sky in their photos and add imaginative elements.
  3. PortraitPro:
    • For portrait photographers and enthusiasts, PortraitPro is a game-changer. Its AI-driven facial recognition technology enables users to retouch portraits with remarkable precision. You can enhance facial features, remove blemishes, and even change the lighting in portraits with ease.
  4. HeyPhoto:
    • HeyPhoto is an up-and-coming AI photo editor that deserves a spotlight in the world of photo editing. This user-friendly tool harnesses the power of AI to make photo editing effortless. With HeyPhoto, you can quickly enhance your photos, apply filters, and perform advanced edits with just a few clicks.

Introducing HeyPhoto

HeyPhoto is a versatile AI photo editor that offers a wide range of features to cater to both beginners and experienced photo editors. Its intuitive interface and powerful AI algorithms make it a valuable addition to your photo editing toolkit.

ai photo editor

Key Features of HeyPhoto:

  1. One-Click Enhancements:
    • HeyPhoto simplifies photo editing with one-click enhancement options. Whether you want to improve brightness, contrast, or sharpness, HeyPhoto’s AI-driven tools can instantly transform your photos.
  2. AI Filters and Effects:
    • HeyPhoto offers a variety of AI filters and effects that can give your photos a unique and artistic touch. From vintage looks to modern aesthetics, you can experiment with different styles effortlessly.
  3. Portrait Retouching:
    • Just like the pros, HeyPhoto allows you to retouch portraits with ease. Remove imperfections, brighten smiles, and enhance facial features for stunning portrait shots.
  4. Background Removal:
    • With HeyPhoto, you can effortlessly remove backgrounds from photos, making it a useful tool for creating product images or customizing backgrounds for your photos.
  5. Batch Editing:
    • For efficiency, HeyPhoto supports batch editing. This feature allows you to apply the same edits to multiple photos simultaneously, saving you valuable time.
  6. AI-Powered Presets:
    • HeyPhoto’s AI-powered presets are designed to automatically enhance specific types of photos, such as landscapes, food, and portraits. These presets can serve as a starting point for your editing journey.
  7. User-Friendly Interface:
    • HeyPhoto’s user-friendly interface ensures that both beginners and experienced editors can navigate the platform seamlessly. You don’t need to be a tech guru to create stunning edits.

Why HeyPhoto Stands Out

While there are many AI photo editors available, HeyPhoto stands out for several reasons:

  1. Accessibility:
    • HeyPhoto’s easy-to-use interface and one-click enhancements make it accessible to anyone, regardless of their prior editing experience.
  2. Versatility:
    • HeyPhoto caters to a wide range of editing needs, from basic enhancements to advanced retouching and creative effects.
  3. Affordability:
    • HeyPhoto offers competitive pricing plans, making high-quality AI editing accessible without breaking the bank.
  4. Constant Innovation:
    • HeyPhoto is committed to staying at the forefront of AI photo editing technology. They regularly update their platform with new features and improvements.

Conclusion

The world of photo editing has been forever transformed by the introduction of AI technology. AI photo editors have made the once complex and time-consuming process of editing images accessible to everyone. While established players like Adobe Photoshop and Luminar AI continue to lead the way, emerging tools like HeyPhoto are making their mark with user-friendly interfaces and powerful AI capabilities.

In the quest to find the best AI photo editor for your needs, it’s essential to consider factors like ease of use, versatility, and affordability. HeyPhoto, with its impressive array of features and commitment to innovation, is undoubtedly a noteworthy contender in the ever-evolving landscape of AI photo editing tools. Whether you’re a seasoned photographer or a casual smartphone snapper, HeyPhoto can help you unleash your creativity and take your photos to the next level with the magic of AI. So, why not give it a try and see how HeyPhoto can transform your images today?

In a world where visual content dominates, the integration of AI in photo editing is a game-changer. Adobe Photoshop, Luminar AI, and PortraitPro have set high standards, but HeyPhoto is an emerging star that shines brightly. With its intuitive interface, one-click enhancements, AI filters, and versatile features, HeyPhoto makes photo editing accessible to all. Whether you’re a professional or a casual photographer, HeyPhoto’s affordability and constant innovation make it a compelling choice. As AI continues to shape the future of photo editing, HeyPhoto’s user-friendly approach and powerful AI algorithms make it a tool worth exploring for anyone seeking to unlock their creative potential.

HeyPhoto’s unique features, such as background removal, batch editing, and AI-powered presets, cater to diverse editing needs. Its commitment to accessibility, versatility, and affordability positions it as a standout choice in the competitive AI photo editing landscape. As AI technology continues to advance, HeyPhoto remains at the forefront, offering both beginners and experts a user-friendly platform to harness the transformative power of AI in photo editing. With HeyPhoto, you can effortlessly elevate your photos, explore your creative potential, and stay ahead in the ever-evolving world of visual content creation. Give HeyPhoto a try today and witness the future of photo editing.

In a world where visual content dominates, the integration of AI in photo editing is a game-changer. Adobe Photoshop, Luminar AI, and PortraitPro have set high standards, but HeyPhoto is an emerging star that shines brightly. With its intuitive interface, one-click enhancements, AI filters, and versatile features, HeyPhoto makes photo editing accessible to all. Whether you’re a professional or a casual photographer, HeyPhoto’s affordability and constant innovation make it a compelling choice. As AI continues to shape the future of photo editing, HeyPhoto’s user-friendly approach and powerful AI algorithms make it a tool worth exploring for anyone seeking to unlock their creative potential.

Exploring the Fascinating World of Gender Swap Filters by HeyPhoto

In the age of digital technology, our lives are increasingly intertwined with social media platforms and photo-sharing apps. These platforms have revolutionized the way we communicate, allowing us to express ourselves in creative and entertaining ways. One such trend that has taken the internet by storm is the use of gender swap filters. Among the many apps and tools available, HeyPhoto’s Gender Swap Filter has gained significant popularity. In this article, we’ll delve into the fascinating world of gender swap filters by HeyPhoto, exploring their rise to fame, their impact on society, and the technology behind them.

The Rise of Gender Swap Filters

Gender swap filters have become a ubiquitous part of our online interactions, transforming the way we perceive ourselves and others. These filters allow users to see what they would look like as a member of the opposite gender, sparking curiosity and amusement. The rise of gender swap filters can be attributed to several factors:

  1. Entertainment Value: Gender swap filters offer a fun and entertaining way to experiment with one’s appearance. They allow users to experience the novelty of seeing themselves in a different gender’s shoes, often resulting in laughter and shared experiences among friends and family.
  2. Virality on Social Media: The popularity of gender swap filters can be largely attributed to their virality on social media platforms. Users eagerly share their transformed photos, which, in turn, encourage others to try the filters themselves. This cycle of sharing has led to a viral phenomenon.
  3. Acceptance and Inclusivity: Gender swap filters have also played a role in promoting acceptance and inclusivity. By allowing users to explore their gender identity in a playful manner, these filters have contributed to important conversations about gender and self-expression.

HeyPhoto’s Contribution to the Trend

HeyPhoto, a prominent player in the world of photo-editing apps, has made significant contributions to the popularity of gender swap filters. The company’s user-friendly interface and advanced technology have made it a go-to choice for those looking to explore this unique form of self-expression.

gender swap filter

Key Features of HeyPhoto’s Gender Swap Filter

HeyPhoto’s Gender Swap Filter offers a wide range of features that set it apart from other similar apps:

  1. Realistic Transformations: HeyPhoto’s filter uses advanced facial recognition technology to create highly realistic gender transformations. Users are often amazed at how convincingly they appear as a member of the opposite gender.
  2. Customization Options: The app allows users to customize their transformed appearance. From changing hairstyles and adding makeup to adjusting facial features, HeyPhoto provides a wide range of customization options.
  3. Privacy Controls: Privacy is a top priority for HeyPhoto. Users can choose to share their transformed photos or keep them private, giving them full control over their digital identity.

The Impact on Self-Perception

gender swap filter

Gender swap filters, including HeyPhoto’s, have had a profound impact on how individuals perceive themselves and their gender identity. While these filters are primarily used for entertainment, they have sparked important discussions about gender and self-expression.

  1. Exploration of Gender Identity: For many users, gender swap filters provide a safe space to explore their gender identity and expression. It allows them to experiment with different gender presentations without the fear of judgment.
  2. Increased Empathy: By experiencing life from the perspective of the opposite gender, users often gain a deeper understanding of the challenges and experiences faced by people of different genders. This increased empathy can lead to more inclusive and accepting societies.
  3. Encouraging Authenticity: Gender swap filters can encourage authenticity by empowering individuals to embrace their true selves. They remind us that gender is not solely defined by physical appearance but by how we feel and identify.

The Technology Behind HeyPhoto’s Gender Swap Filter

HeyPhoto’s Gender Swap Filter relies on sophisticated technology to create its realistic transformations. Facial recognition algorithms analyze key facial features and apply gender-specific adjustments. Here’s a brief overview of the technology involved:

  1. Facial Recognition: The app uses facial recognition technology to identify key facial landmarks, such as the eyes, nose, and mouth. This allows it to accurately map and manipulate the user’s features.
  2. Gender-Specific Adjustments: HeyPhoto’s algorithm applies gender-specific adjustments to the user’s photo. For example, it may soften facial features and add makeup for a female transformation or add facial hair for a male transformation.
  3. Machine Learning: The app’s machine learning capabilities continuously improve its accuracy and realism. It learns from user interactions and feedback to refine its gender-swapping algorithms.

The Ethical Considerations

While gender swap filters offer entertainment and opportunities for self-exploration, they also raise ethical concerns. It’s important to address these issues as the technology continues to evolve:

  1. Reinforcing Stereotypes: Gender swap filters can inadvertently reinforce stereotypes about gender presentation. Users may feel pressured to conform to certain beauty standards or gender norms based on their transformed appearance.
  2. Privacy Concerns: The sharing of transformed photos on social media can lead to privacy concerns. Users should be aware of the potential consequences of sharing such personal information online.
  3. Potential for Misuse: Like any technology, gender swap filters can be misused. They have been used to deceive others or engage in harmful behavior. Responsible usage and awareness of the ethical implications are crucial.

Conclusion

HeyPhoto’s Gender Swap Filter, along with similar technologies, has transformed the way we perceive and explore gender identity and expression. Its popularity highlights the human fascination with self-transformation and the power of technology to facilitate these experiences.

As we continue to embrace the possibilities of gender swap filters, it’s essential to approach them with a sense of responsibility and respect for diversity. They can be valuable tools for self-exploration and empathy-building when used mindfully. Ultimately, HeyPhoto’s Gender Swap Filter serves as a testament to the evolving relationship between technology and our understanding of gender in today’s digital age.

How to Remove Background from Image on Mac: Simple and Effective Techniques

Looking to remove background on Mac? Discover how to remove the background of a picture on a Mac with these easy steps. It’s as easy as doing it with Icons8 Background Remover!

Remove Background from Image on Mac

With the powerful editing tools available on Mac, removing the background from any picture is a breeze.

To start, open the image on your Mac and select “Markup.”

Use the “Instant Alpha” tool to precisely remove the background from the picture.

Refine the selection by adjusting the tolerance level as needed.

Read also: Gender Swap Filter y HeyPhoto

Best 10 AI Photo Editors

Delete or replace the background effortlessly and save the edited image.

By following these steps, you can quickly remove the background from any picture on your Mac.

Enhance your photos and achieve professional-looking results effortlessly.

Unlock the full potential of your Mac and become an editing pro.

Remove distractions, focus on the subject, and create stunning visuals with ease.

Remove Background from Image on iPhone: Quick and Easy Steps

Are you wondering how to remove the background from a picture on your iPhone? Look no further! In this guide, we will show you how to easily remove the background from any image on your iPhone.

For additional tips, go here.

Remove Background from Image on iPhone

With the built-in editing tools on your iPhone, removing the background from a photo is a straightforward process. Follow these simple steps to achieve the desired result, like in this site.

To begin, open the Photos app on your iPhone and select the image you want to edit. Tap on “Edit” and choose “Markup” from the options.

Next, use the magnifier tool to capture the subject in the image. Tap on the wand icon to automatically detect and highlight the background.

If needed, you can refine the selection by erasing or adding areas. Once satisfied, tap on “Done” to save your changes.

Lastly, save the edited image without the background. That’s it! You have successfully removed the background from your photo.

By following these quick and easy steps, you can remove the background from any picture on your iPhone. Enhance your photos and create stunning visuals effortlessly.

Unlock the potential of your iPhone and impress others with your editing skills. Start removing backgrounds from your photos today!

Mastering Background Removal in Microsoft Word: Unleashing Creative Freedom

The power to remove backgrounds from images is a game-changer when it comes to crafting visually compelling documents in Microsoft Word. Whether you’re an aspiring graphic designer or simply want to add a professional touch to your reports, mastering background removal in Word opens up a world of creative possibilities. In this article, we will embark on a transformative journey, guiding you through a step-by-step process to unlock the full potential of background removal in Microsoft Word.

Remove background from picture in Word

Step 1: Inserting and Selecting the Picture Launch Microsoft Word and open a new or existing document. Choose the ideal spot to insert your picture and navigate to the “Insert” tab on the toolbar. From there, click on “Pictures” and select the desired image. Once inserted, click on the picture to activate it.

Step 2: Embracing the Picture Format Tab Upon selecting the image, you’ll notice the “Picture Format” tab gracefully appearing in the toolbar. This tab houses the key tools and features needed for background removal.

Step 3: Unveiling the Background Removal Tool Within the “Picture Format” tab, seek out the magical “Remove Background” button. With a simple click, Microsoft Word will initiate an automatic analysis of the image, working diligently to identify and highlight the background with a captivating magenta overlay.

Step 4: Refining the Selection with Precision While Word’s automatic background removal is impressive, perfection may require a touch of finesse. Journey forth to the “Background Removal” tab that emerges once you click “Remove Background.”

Quick tip: Remove Background from Image on iPhone: A Step-by-Step Guide; What Is the Best Online Background Remover?; Exploring Icons8 Background Remover

Step 5: Unleashing Manual Control Within the “Background Removal” tab, revel in the array of manual refinement tools at your disposal. Engage with the “Mark Areas to Keep” and “Mark Areas to Remove” options, enabling you to fine-tune the selection to your heart’s desire. With these tools, you can take full control of which areas should be included or excluded from the background.

Step 6: Witnessing the Transformation Unfold As you conclude the refining phase, savor the moment of revelation. Preview the image to ensure that the background removal has yielded the desired result. Once satisfied, seize the opportunity to click “Keep Changes” and watch as your image is transformed before your eyes.

Remove background from picture in Word

Congratulations! You have embarked on a transformative journey, unleashing the power of background removal in Microsoft Word. By following the step-by-step process outlined in this article, you now possess the tools and knowledge to elevate your document designs to new heights. With the ability to remove backgrounds effortlessly, you can infuse your work with a professional and artistic flair. Embrace this newfound skill, and let your creativity flow freely as you craft visually captivating documents that leave a lasting impression. Microsoft Word has become your artistic canvas, and background removal is your key to unlocking creative freedom.

Read also: 

Remove Background from Image on iPhone: Easy Steps to Follow

Remove Background from Image on iPhone: Quick and Easy Steps

How to Remove Background from Image on iPhone

What Is the Best Free Background Remover Tool?

What Is the Best Free Background Remover Tool?

What is the Best Free Background Remover on the Web?

(more…)

11 Examples and Applications of UX Design Tools

People who frequent Facebook do not call themselves Facebookers. That’s only not something. But people literally call themselves Redditors.

Robinson Scott, a senior UX design professional at Reddit, underscored that the stronger the audience identifies with a platform, the less likely it will be to embrace changes to its interface. The same is true of platforms such as Reddit, which are known for their lightweight and simple aesthetic, although users ultimately benefit when they are inundated with updates and tailored specifically to improve their experiences.

Adding new features is certainly more challenging now, he said. Scott expected that the unexpected flood of vocal Reddit users is both a benefit and a curse at the same time. He does not need feedback access.
Scott Madison’s challenge of UX replication is analogous to the task posed to practically every UX design professional when they concentrate on pushing usability improvements onto users. Reddit had a reputation for perplexing newcomers because the founder of Reddit himself called it the “pre-makeover look” dystopian Craigslist . Only complicating things.

San Francisco is like a little city, said Scott, a guy who usually tries out new technologies. Folks claim that technology brought ruin to San Francisco, but I do not believe this. It should indicate that we ought to preserve the integrity of any change, whether it has the potential to be good or bad, whether it’s to a city or a site. Their culture is a target for your pernicious elk antler story. Our culture adds a whole level of difficulty to the job.

To start with, balance calls for gathering substantial feedback through user testing and research. It then demands drawing up several basic frameworks and advanced prototypes. Finally, the method calls for keeping large groups of coworkers very well organized.
We’ve also reached out to a specialist in user experience, goodness Scott, who currently works at Salesforce. He introduced us to two more specialists, one of whom is currently designing user experience at Salesforce and the other who is based out of San Francisco. They all told us their preferred tools for designing products that people actually want to utilize.

User Research and Testing

Before creating and implementing a feature, it’s smart to make sure it is something that users actually want. This critical process of soliciting feedback is, to begin with, a two-prong process: product teams first conduct research to determine the needs and wants (articulated and unspoken) of their audience. Scott and Dale then try out a prototype of their design so it’s made compliant with their needs before passing it over to programmers for them to build out. These resources are a few that Scott and Dale emphasized as particularly beneficial in this stage.

UX design

Google Sheets

The old-fashioned spreadsheet is not likely to win the prize of UX Design’s Tool of the Year for some time yet, but it ’s an excellent standby for both centralizing user feedback and quickly sorting and teasing out meaning, as Dale pointed out. I always make sure to take interview notes in a physical spreadsheet so I can sort and filter their answers to find patterns and find anything worth discussing. At that point, creating graphs and conclusions is effortless. Either Microsoft Excel or Google Sheets will get the job done; such as much else in the UX design toolkit, it simply boils down to personal preference.

Userzoom

Scott is new to this particular platform, but he wholeheartedly embraces it as a devout long-standing supporter. UserZoom’s unmoderated testing platform allows you to submit any feedback or criticism through the platform instead of instructing and babysitting a bunch of testers. After you send your design, it will be segmented and screened as necessary by your online community of users. The procedure is somewhat automated, but it can save you loads on money and time. You still must combine all your findings into an analysis, but before starting, when I was doing an evaluation, the process used up most of an entire day. You essentially submitted a test version of the site in just a few days’ time, and you had 15 interactive video streams for a returned model site.”

UX design process

User testing

Regardless of which design route they decide upon, some organizations prioritize the user experience and set up engineers purposefully to track user responses and behaviors. Dale prefers to either hand over his prototypes to an individual researcher or go ahead and set up a lab-style test environment himself. For the unsupported route, he has stated the website UserTesting in particular because it can quickly build a pool for testing.

UX design process

Flowcharts & Wireframing

UX design software
A user experience (UX) designer allows prospective users to interact with a product’s UI. If any wrinkles arise during the evaluation of initial user feedback, UX designers skills include an ability to cope with these through subsequent tweaks, like having a plan for writing a flowchart of the user experience (this may be as simple as a literal pen-and-paper sketch or a map of sticky notes on the wall). It may mean, in addition to outlining wireframes, drawing up a rudimentary skeleton prototype. You can read about Scott’s and Dale’s recommendations for both prototyping wireframes and drawing the skeletal outlines of each prototype in this article.

Whimsical

Data and content are distributed throughout entities. If a user progresses from one point to another on a website or app, they follow a path. In the first step, a designer creates the pathways by which these entities interact, known in UX circles as information architecture. Along with some wireframing platform that is straightforward to use and nicely understated, Whimsical provides a collaborative flowcharting widget, abundant with real-time collaboration and a pleasing visual design. It is free of charge, if you’ve got an active Whimsical membership.

Sketch

Categorizing the visual field, Sketch was a kind of UX and UI surface area when it introduced. Photoshop was not extensively regarded as for designing merchandise, but the lack of choices made it designers de facto wireframing and mockup instrument for a long time. Now a favorite in the sector, Sketch liberated the UX area from the constraint and cost of the Creative Suite. Adobe products are very heavy and generally expensive, and I tend to use them in my photography. I d like to use Photoshop for design, though.
Dale is a faithful fan of Sketch, too. Nothing beats it for mockups, and the range of add-on modules is limitless, he said, referring to the ever-expanding array of utilities available to enhance the app’s factory design functions. The versatility also makes it easier to switch between platforms. Dale, who’s used to wireframe in both digital and analog formats, keeps both digital wireframes and the analog wireframes that he made in the same design applications he uses to create mockups. (It’s also used to prototype.) It is likely that the dimensions of these wireframes and the spacing between them will allow the process to go smoothly.

Figma

UX design process
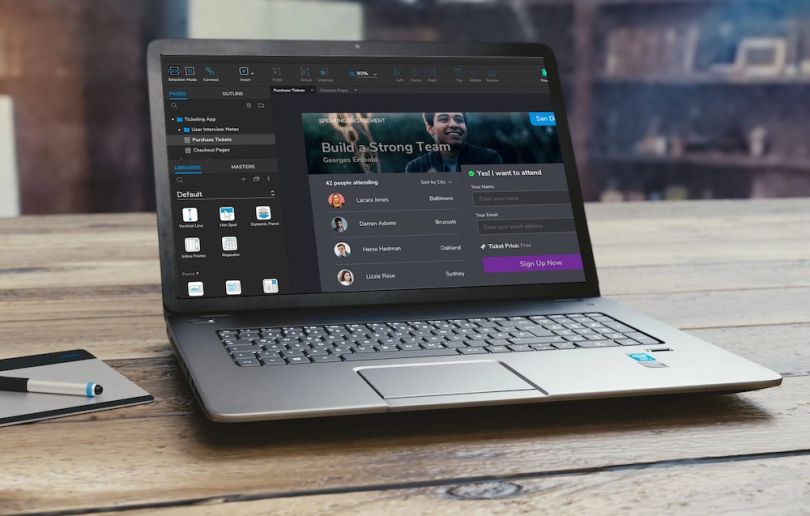
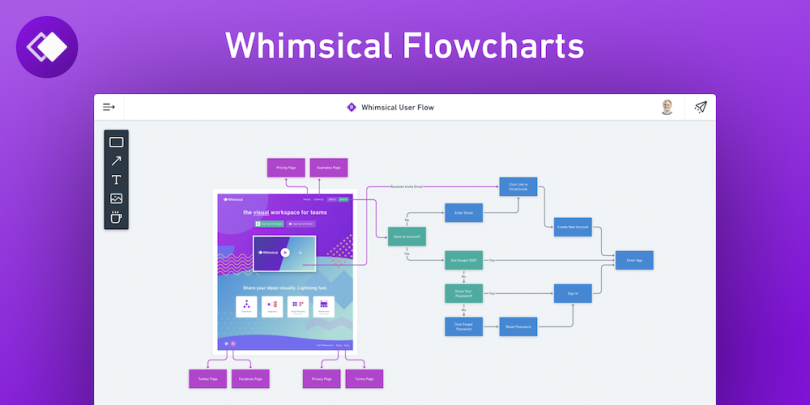
A little bit like Facebook’s Tilt 5 or a few years back, Figma is an emergent, buzzed-about, and wide-ranging tool that enables users wireframe, showcase, design, and between the two groups. The platform works on both Windows and Mac and has two aspects that place a major influence of it to stand out from the group. First, it operates on a cloud-based structure. So rather than downloading an application, designers may design right in the browser. Second, and perhaps most impressive, is the company’s claim on multiplayer editing the capacity for multiple individuals to access and alter a design together in real time.
I think its simple because its function is based on collaboration, said Scott. The assumption that two designers can workon the same file at the same time is insane. You can’t do that in any other tool. Access can also be streamlined, set up was simplified. When you have Google Docs, you can simply send links as you would with a document.

Prototyping

UX design principles
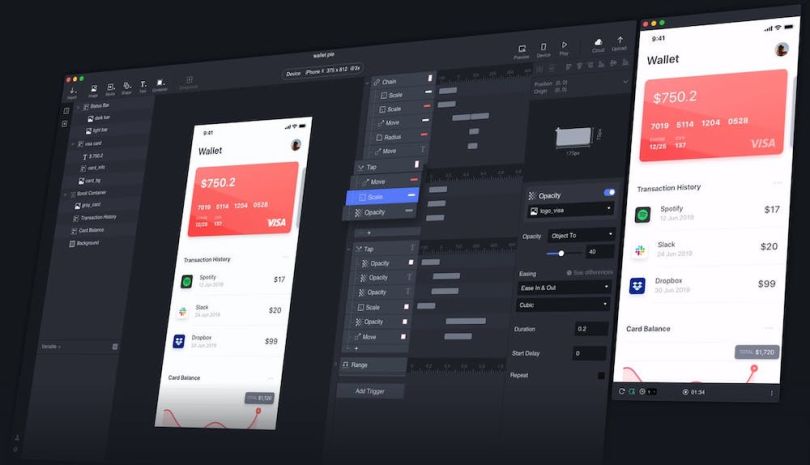
Typically, a design goes through several iterations, or “frames,” to get to the point where it is professional. Dissimilar to a wireframe, a prototyping model has more lifelike qualities, allowing designers and clients to tailor its functionality and improve its accessibility. Because aforementioned heavyweights Sketch and Figma both allow prototyping, UX designers often use various other resources to add finishing touches such as UX logic and animations, so that test users are presented with something that looks as close to the final product as possible.

Axure Rp

Imaginetsenior UX consultant Yichen makes the case for this underdog software, in part for its best-in-class interaction logic. Dale agreed, calling the rapid-prototyping tool one of the most underrated of its kind. His functions allow him to develop compelling objects that behave in real time on prototypes with only a few screens.

Dale provided this illustrative anecdote: One time, a designer coworker thought it would be impossible to prototype a magic wall chart he made. He needed a vertical red box to keep track of the user’s cursor so they could highlight specific time zones on a list of vertical images. After he showed me his mockup, I used it in Axure without writing code to create the capabilities he needed to construct a functional prototype. It only took a few minutes. Some believed the prototype to be the real thing. The users had no idea that it wasn’t a working program, Dale said.

Principle

In order to invest my time in usability studies appropriately, I should create prototypes that appear to be fully functional as if they’re almost finished, according to Scott. When he is editing a Sketch or Figma design file, he will often turn to ProtoPie or Principle to enhance its fidelity. It excels in animation, meaning it can render smooth screen transitions, track specific outputs, and force certain outputs for different user interactions like that of double-taping and scrolling or long pressing. It will not be exactly as the built product, but it will be close enough. When you test it, the user will not be worried about the fact that it didn’t feel like a thing, because it feels like a thing.

Prototype by Studio XID

We’re unaffected by one tool, Scott said. ProtoPie, for instance, serves as an effective tool for mobile design. In this video, our lead designer provides an introductory tutorial, detailing the ProtoPie interface, which includes fillable and canvas panels, along with an “interaction” panel where designers can add triggers and respond to user input. Users are now able to experiment using a prototype on their mobile phones. If a prototype needs a connection with, for example, a smartphone’s camera, a ProtoPie design can facilitate access to it. Much like Principle Mode, it tends to make for a smoother, more completed experience than InVision’s, to distinguish Scott, who mentioned that unique program rendering seem rather sketchier like a drawing of a page in its entirety, quite similar to a run.

Process Management & Handoff

UX designers work in an exceptionally fast-paced environment with lots of different stakeholders. They also have to coordinate with several that accompanies one another collectively and maintain a well-defined workflow. Yes, business and a well-mapped workflow are important. UX designers convey that there should not be more than a handful of steps to the procedure, given that they have to make the procedure look attractive. Programmers and users should keep it as simple as possible.

Trello

UX design toolThe folks operating the r/squeeky_laughter subreddit at Reddit utilize what partners at Google have available to maintain project workflows. We record only where the job is to be done and when it is due, with links down to the Google Translate. But within that broader context, he’s also got a private Trello board, which he shares with one other designer, to track more specific details that are specific to him. The engineering team utilizes Jira, but we try not to overcomplicate it, Scott said. I’m not sure it is the ideal system possible, but it functions. I never have trouble finding things.

Google Drive

When a design fully meets all the standards set during development, it moves onto the development team, which converts it into a real-world product. The late-stage handoff is the last stage in this process. Dale offered that the options are varied, but most companies use Google to facilitate this process for security-related reasons. Oftentimes, software with collaboration capabilities do not endure at many businesses, he clarified. So you have to make do with the old tried-and-true Google Drive. But if I had my choice, programs like InVision, Zeplin, and Abstract are great.

8 Best Places to Find Free Sun Clipart

Free sun clipart can act as a great way to add various colorful images to your project. You’ll be graced with a variety of images of yellow, red, blue, green, and even pink sun once you utilize these complimentary clipart images.

 Simply click on the of these clipart images you wish to obtain, then right-click to download or reserve it for usage offline. In the editing program, you can incorporate the images you saved easily.

All the sun clipart Illustrations from this page are free, but you must respect the images’ copyright rules by checking each site’s terms.

If you’re searching for less specific images, there are a number of summer-themed pictures, you can find them too on these resources. There is an easy-to-use search bar that lets you filter images by subjects. You can find more summer pictures here, like ice cream, sunscreen, fruits, etc. 

  1. Ouch 

Ouch has several cost-free sun clipart images with smiley and sad faces, dresses, sunglasses, and different kinds of additional visual elements. To download the sun images, click on an image and then right-click to save it to your computer.

Sun clipart illustration

  1. Pinterest 

Pinterest offers numerous clipart images featuring the sun and a variety of other summer motifs. Along with such borders, you can also find numerous moon outline clipart images.

Read also: Gender Swap Filter y HeyPhoto

  1. Adobe Stock 

We offer lively images of the sun here at Adobe Stock that you can download in small, medium, or large sizes. View the images below to see sun clipart with different styles, colors, visual effects, and graphic elements.

Sun clipart illustration

  1. Freepik 

There are only a few images of the sun from which to choose at Freepik, but don’t miss out on those images. Find free images of the rainbow, rain, moon, beach, sand, and other crucial summer elements.

Sun clipart illustration

  1. Clipart World 

Clipart World has 14 totally free photos of the sun and other similar images, icons and photos, like the moon, rainbow, and ice cream. These HD photos are free to download. Click on the thumbnail to get the largest image, connected to your system.

  1. Shutterstock 

There are a lot of beautiful sun images here on Shutterstock. You’ll find images of a smiley sun, sad sun, a sun wearing a dress, and even a sun in a pink color. These images are of high quality and easily downloaded or printed. Follow the link to the thumbnail of the image to view it and print or download it.

  1. Clipart 

Clipart’s free sun clipart includes lots of lovely sun and summer-related images, for example, the gaudy yellow hibiscus here. Apart from the summer graphics, you’ll discover sunglasses, dresses, sand, and a beach else for cleanup in the summer. To download one of these images, just click the thumbnail image, then look out for your preferred file type.

Sun clipart illustration

  1. Classroom Clipart

The free spring clip art from Classroom Clipart includes images of the sun, rain, the moon, butterflies, birds, umbrellas, and bees. They’re all very colorful and bold, making them a great choice for your summer project. Just right-click on any of the sun clipart images to save them to your computer.