How to Choose the Right Flag Icons for Your Projects

In today’s globalized world, projects often cater to an international audience. Whether you’re designing a website, creating a mobile app, or working on a marketing campaign, flag icons can be a crucial element in communicating effectively with users from different countries. Flag icons are more than just decorative elements; they can convey critical information about language options, geographic relevance, and cultural representation. However, choosing the right flag icons for your projects requires careful consideration of several factors. This blog post will guide you through the process of selecting the most appropriate flag icons to enhance the user experience and achieve your project’s goals.

Understanding the Importance of Flag Icons

flag icons

Flag icons serve multiple purposes in various types of projects. They are commonly used to:

  1. Indicate Language Options: When a website or application supports multiple languages, flag icons can help users quickly identify and switch to their preferred language.
  2. Represent Geographic Locations: Flag icons can signify the geographic origin of content, products, or services. For instance, e-commerce sites may use flags to indicate the shipping country.
  3. Cultural Representation: Flags can be used to celebrate cultural diversity and inclusivity, especially during international events or campaigns.
  4. User Interface Elements: Flags often appear in user interfaces as part of dropdown menus, buttons, or navigation elements.

Given their varied uses, it’s essential to choose flag icons that are accurate, high-quality, and contextually appropriate.

Factors to Consider When Choosing Flag Icons

When selecting flag icons for your projects, consider the following factors:

1. Accuracy and Authenticity

Ensure that the flag icons you choose are accurate representations of the official national flags. This includes the correct colors, proportions, and design elements. Inaccurate flags can lead to confusion and may offend users from the represented countries.

2. Quality and Resolution

High-quality flag icons are crucial for a professional appearance. Choose icons that are available in multiple resolutions and formats (e.g., SVG, PNG) to ensure they look sharp on various devices and screen sizes. Scalable Vector Graphics (SVG) format is particularly useful because it maintains quality at any size.

3. Contextual Relevance

Consider the context in which the flag icons will be used. For instance, using the Union Jack to represent the English language can be controversial since English is spoken in many countries. In such cases, a more neutral symbol or a combination of flags may be more appropriate.

4. Accessibility

Ensure that the flag icons are accessible to all users, including those with visual impairments. This may involve providing alternative text descriptions for screen readers and ensuring sufficient color contrast.

5. Consistency

Maintain consistency in the style and design of flag icons across your project. Inconsistent icon styles can make your project look unprofessional and disjointed. Many icon libraries offer sets of flag icons that are consistent in style.

6. Licensing and Usage Rights

Check the licensing and usage rights of the flag icons you choose. Some icon sets are free to use, while others may require attribution or payment. Ensure you comply with the licensing terms to avoid legal issues.

Popular Sources for Flag Icons

There are several reliable sources for high-quality flag icons. Here are some popular options:

1. Icon Libraries

  • Icons8: Icons8 offers a comprehensive set of icons, including flag icons. These icons are vector-based and can be customized in terms of size, color, and style.
  • Flaticon: Flaticon provides a vast collection of flag icons in various styles and formats. It offers both free and premium options.
  • Noun Project: The Noun Project hosts a diverse collection of icons created by designers from around the world, including flag icons. It offers subscription plans for unlimited access.

2. Design Tools

  • Canva: Canva is a popular design tool that includes a wide range of flag icons in its library. These icons can be easily customized and incorporated into your designs.
  • Figma: Figma offers various plugins and resources for flag icons. You can find community-created libraries that provide high-quality flag icons for your projects.

3. Dedicated Flag Icon Sets

  • GoSquared Flag Icons: This is a dedicated set of flag icons designed for web use. The icons are available in SVG format and are free to use.
  • Twemoji: Created by Twitter, Twemoji includes a set of flag emojis that are open-source and free to use. These icons are great for projects that aim for a more playful or casual tone.

Best Practices for Using Flag Icons

To maximize the effectiveness of flag icons in your projects, follow these best practices:

1. Use Flags Appropriately

Avoid using flag icons to represent languages directly. Instead, use flags to indicate countries and provide a language switcher with text labels. This helps avoid confusion and ensures clarity.

2. Provide Clear Labels

Accompany flag icons with clear text labels. This is especially important for accessibility and for users who may not recognize certain flags.

3. Optimize for Performance

Use optimized versions of flag icons to ensure they load quickly. Compress images and use SVGs where possible to reduce file sizes without compromising quality.

4. Test Across Devices

Ensure that flag icons look good and function correctly across different devices and screen sizes. Test your project on various platforms to identify and fix any issues.

5. Respect Cultural Sensitivities

Be mindful of cultural sensitivities and political contexts when using flag icons. Some flags have significant historical or political connotations that may affect how they are perceived by users.

Examples of Effective Flag Icon Usage

flag icons

1. Language Switchers

Many multilingual websites use flag icons in language switchers to help users quickly identify and select their preferred language. For example, a language switcher might include the flags of the United States, Spain, and France to represent English, Spanish, and French languages, respectively.

2. Geographic Indicators

E-commerce platforms often use flag icons to indicate the shipping country. For instance, a product page might display the flag of Germany to show that the item ships from Germany.

3. Cultural Celebrations

During international events such as the Olympics or World Cup, websites and apps often use flag icons to celebrate the participating countries. This adds a festive and inclusive touch to the user interface.

4. User Profiles

Social media platforms and forums may allow users to display their country’s flag on their profile. This helps foster a sense of community and global connectivity.

Conclusion

Flag icons are a powerful tool in your design arsenal, capable of enhancing user experience, indicating geographic relevance, and celebrating cultural diversity. By considering factors such as accuracy, quality, contextual relevance, accessibility, consistency, and licensing, you can choose the right flag icons for your projects. Leveraging popular sources and following best practices will ensure that your use of flag icons is effective, respectful, and visually appealing.

Remember, the goal is to create a seamless and inclusive experience for all users. Thoughtfully chosen flag icons can help you achieve this goal and make your project stand out in the global landscape. Whether you’re designing a multilingual website, an international marketing campaign, or a culturally diverse app, the right flag icons will enhance your project’s impact and user engagement.

Behind the Snapshot: The Psychology of Camera Icons in Graphic Design

In today’s digital age, where images dominate social media feeds and visual communication reigns supreme, the camera icon has become an ubiquitous symbol. Found on smartphones, computers, and various applications, this tiny graphic holds significant psychological power in conveying the idea of capturing moments. But what exactly makes the camera icon so universally recognizable and appealing? In this blog post, we’ll delve into the psychology behind camera icons in graphic design, exploring why they resonate with users and how designers leverage these symbols to evoke emotions and associations.

The Power of Visual Metaphors

camera icons

At its core, the camera icon serves as a visual metaphor for the act of photography. It encapsulates the essence of capturing moments and preserving memories in a single, simple symbol. This visual shorthand allows users to quickly understand the function of a button or feature without the need for lengthy explanations. In a fast-paced digital environment, where attention spans are fleeting, the camera icon’s ability to convey meaning at a glance is invaluable.

Cultural Associations

The prevalence of camera icons in graphic design can also be attributed to cultural associations with photography. From the advent of film cameras to the rise of digital photography, capturing images has become deeply ingrained in our cultural consciousness. As a result, the camera icon taps into a collective understanding of photography, evoking feelings of nostalgia, creativity, and self-expression.

Psychological Triggers

Beyond its cultural significance, the camera icon triggers psychological responses that enhance its effectiveness in graphic design. The act of taking a photograph is often associated with capturing memories, preserving moments in time, and documenting life experiences. As such, the camera icon can evoke feelings of nostalgia and sentimentality, tapping into our innate desire to immortalize meaningful moments.

Furthermore, the camera icon symbolizes creativity and self-expression. In the hands of a photographer, a camera becomes a tool for capturing unique perspectives and telling stories through imagery. By incorporating camera icons into their designs, graphic designers tap into these associations, positioning their products or services as vehicles for creativity and self-expression.

Design Considerations

camera icons

When incorporating camera icons into graphic design, designers must consider various factors to ensure their effectiveness.

Firstly, simplicity is key. The most successful icons are often the most straightforward, with clean lines and minimalistic designs that are instantly recognizable across different platforms and devices.

Secondly, context matters. The placement and usage of camera icons should align with the overall purpose and aesthetics of the design. Whether it’s a button in a mobile app or a logo for a photography studio, the camera icon should complement the surrounding elements while still standing out as a focal point.

Lastly, versatility is essential. While the basic silhouette of a camera is universally recognizable, designers can experiment with different styles and variations to create unique visual identities. Whether it’s a retro film camera or a sleek digital device, the possibilities are endless.

Conclusion

In conclusion, the camera icon holds significant psychological power in graphic design, serving as a visual metaphor for the act of photography and evoking cultural associations with capturing moments. By tapping into feelings of nostalgia, creativity, and self-expression, designers leverage camera icons to enhance the user experience and communicate complex ideas in a simple, intuitive manner. As technology continues to evolve, the camera icon will undoubtedly remain a timeless symbol of visual communication in the digital age.

Tick Icons in Motion: Dynamic Approaches to Animated Design

In the ever-evolving landscape of digital design, animation has emerged as a powerful tool for enhancing user experience, conveying information, and adding a dynamic flair to interfaces. Among the plethora of animated elements, tick icons stand out as versatile symbols of confirmation, success, and completion. From simple checkmarks to elaborate animated ticks, designers have explored various approaches to bring these icons to life. In this blog post, we delve into the world of animated tick icons, exploring dynamic techniques and creative strategies that elevate their design.

1. The Power of Motion:

check icons
At its core, animation breathes life into static elements, transforming them into dynamic entities that engage users on a deeper level. When it comes to tick icons, motion adds a sense of immediacy and interactivity, reinforcing positive feedback and guiding users through digital experiences. Whether it’s a subtle pulsating effect or a bold animation sequence, the dynamic nature of animated ticks captures attention and communicates effectively.

2. Reinventing the Checkmark:
While the traditional checkmark has long been associated with completion and approval, modern design trends call for innovative reinterpretations. Designers are pushing the boundaries of conventional symbols, infusing them with personality, and imbuing them with motion. From morphing shapes to playful bounces, animated checkmarks take on new forms, reflecting the brand’s identity and engaging users in unexpected ways.

3. Seamless Integration:
Effective animation seamlessly integrates into the user interface, enhancing usability without overshadowing functionality. When implementing animated tick icons, designers must strike a balance between visual appeal and practicality, ensuring that motion serves a purpose beyond mere decoration. By carefully considering timing, easing, and transition effects, animated ticks harmonize with the overall design language, enriching the user experience without causing distraction or confusion.

4. Microinteractions that Matter:
In the realm of UX design, microinteractions play a crucial role in shaping user perceptions and behaviors. Animated tick icons serve as microinteractions that provide instant feedback, affirming user actions and guiding them towards their goals. Whether it’s confirming a successful transaction or indicating completion of a form field, these subtle animations create moments of delight and reinforce user confidence, fostering a positive relationship between the user and the interface.

5. Contextual Animation:
Context is key when designing animated tick icons, as motion should align with the user’s expectations and intentions. Understanding the user’s journey allows designers to implement animation in relevant contexts, emphasizing critical actions and minimizing cognitive load. By contextualizing animation based on user input, system status, or task completion, designers create a cohesive narrative that enhances comprehension and engagement, leading to a more intuitive and enjoyable user experience.

6. Accessibility Considerations:

check icons
While animation adds richness to digital experiences, it’s essential to ensure inclusivity and accessibility for all users. Designers should provide options to disable or adjust animation settings, catering to individuals with visual sensitivities or cognitive impairments. Additionally, incorporating alternative feedback mechanisms, such as sound cues or haptic feedback, ensures that animated tick icons remain effective across diverse user demographics and device capabilities.

7. Iterative Design and Feedback Loops:
As with any design element, animated tick icons benefit from iterative development and user feedback. Designers should test different animation styles, durations, and triggers to gauge user responses and refine their designs accordingly. A feedback loop involving usability testing, analytics, and user surveys helps identify pain points and opportunities for improvement, ensuring that animated ticks align with user expectations and contribute positively to the overall user experience.

Conclusion:
In the dynamic world of digital design, animated tick icons serve as powerful tools for enhancing user experience and conveying information effectively. By leveraging motion, designers can breathe life into static symbols, creating engaging microinteractions that guide users through digital experiences with clarity and confidence. Through careful consideration of context, accessibility, and iterative design processes, animated tick icons become integral components of intuitive and delightful user interfaces.

The Psychology Behind Check Icons: Why They Work in UI Design

In the realm of User Interface (UI) design, icons play a significant role in guiding users through digital experiences. Among the plethora of icons, one symbol stands out for its universal recognition and immediate feedback: the check icon. Whether it’s a simple tick mark or a more stylized check, this symbol has become synonymous with completion, approval, or correctness. But what makes the check icon so effective in UI design? This article delves into the psychology behind check icons, exploring why they work so well and how UI designers can use them to create intuitive and engaging interfaces.

The Universal Appeal of the Check Icon

The check icon’s simplicity and clarity are key to its effectiveness. It consists of a short, diagonal line intersecting a longer one, forming a V-like shape. This minimalist design is easily recognizable across cultures and languages, allowing it to transcend barriers that other symbols might face. This universality gives the check icon a unique advantage in UI design.

Cognitive Psychology: Recognition and Understanding

check icons

From a cognitive psychology perspective, the check icon effectiveness lies in its ability to trigger immediate recognition. Human brains are wired to recognize patterns, and the check icon’s simple shape makes it easy to identify quickly. This rapid recognition reduces cognitive load, allowing users to focus on the task at hand without confusion.

Moreover, the check icon carries a clear message. It represents a positive outcome, such as approval, completion, or success. This clarity of meaning reinforces users’ understanding of what the icon represents, eliminating ambiguity and enhancing the overall user experience.

The Positive Reinforcement Effect

The check icon’s association with positivity is another reason it works so well in UI design. When users see a check icon, it often indicates that they’ve completed a task, achieved a goal, or made the right choice. This creates a sense of accomplishment and satisfaction, reinforcing positive behavior.

For example, when a user completes a form and sees a check icon, they feel a sense of achievement, encouraging them to continue engaging with the interface. This positive reinforcement can lead to increased user engagement and satisfaction, which are critical metrics for any UI design project.

Check Icons in Context: Enhancing User Experience

Check icons are most effective when used in the right context. They work well in various scenarios, such as indicating successful form submissions, confirming selections, or signaling task completion. UI designers must consider the context in which they use check icons to ensure they align with user expectations.

Form Validation and Submission

One common use of check icons is in form validation and submission. When users complete a form field correctly, a check icon can provide immediate feedback, letting them know they’ve entered valid information. This instant validation helps users feel more confident about their input, reducing errors and frustration.

Similarly, after submitting a form, a check icon can confirm that the submission was successful. This clear indication of success reassures users and reduces uncertainty about whether their action was completed as intended.

Task Completion and Progress Tracking

Check icons are also effective in task completion and progress tracking. In to-do lists or task management apps, check icons can indicate that a task has been completed, providing users with a clear sense of accomplishment. This visual cue motivates users to continue completing tasks, fostering productivity and engagement.

In progress-tracking interfaces, such as onboarding processes or multi-step forms, check icons can mark completed steps. This visualization of progress helps users understand where they are in a process, reducing confusion and anxiety.

Confirmation and Approval

Another context in which check icons excel is confirmation and approval. In e-commerce websites, for example, a check icon can indicate that a product has been added to the cart or that an order has been successfully placed. This immediate confirmation reassures users and reduces doubts about their actions.

Similarly, in social media platforms, check icons can signal that a user has successfully liked, followed, or shared content. This positive feedback encourages users to interact with the platform and engage with others, enhancing the overall user experience.

Design Considerations for Check Icons

check icons

While check icons are versatile and effective, UI designers must consider several factors to ensure they are used appropriately and effectively.

Consistency and Standardization

Consistency is crucial when using check icons in UI design. Designers should ensure that check icons are used consistently across the interface, maintaining the same style, color, and size. This standardization helps users quickly recognize the icon’s meaning and reduces confusion.

Accessibility and Contrast

Accessibility is a critical consideration in UI design. Check icons should have sufficient contrast with their background to ensure they are visible to users with visual impairments. Designers should also consider providing text-based alternatives for users who rely on screen readers or other assistive technologies.

Context and Placement

The context in which check icons are used is essential. Designers should ensure that the placement of check icons aligns with user expectations. For example, in form validation, check icons should appear next to the field being validated, providing immediate feedback. In task completion scenarios, check icons should be placed in a way that clearly indicates which task has been completed.

Conclusion

The check icon’s effectiveness in UI design can be attributed to its universal recognition, positive reinforcement, and clear communication. By understanding the psychology behind check icons, UI designers can create interfaces that are intuitive, engaging, and user-friendly. When used appropriately, check icons can enhance the overall user experience, fostering positive interactions and encouraging continued engagement.

As UI designers continue to explore new design trends and techniques, the check icon remains a timeless and powerful tool for creating user-friendly interfaces. By incorporating these principles into their design practices, designers can ensure that their users enjoy a seamless and satisfying experience.

How to Incorporate Calendar Icons into UI Designs

Calendar icons are more than just simple date indicators; they play a pivotal role in user interface (UI) design by helping users understand scheduling, timelines, and date-related interactions. For UI designers, knowing how to incorporate these icons effectively can enhance user experiences, improve usability, and contribute to a coherent design system. In this article, we’ll explore best practices, design considerations, and examples to help you make the most of calendar icons in your UI designs.

1. The Role of Calendar Icons in UI Design

Calendar icons serve various purposes in UI design. They can indicate date-related information, prompt users to select dates, or symbolize scheduling features. By integrating calendar icons, designers can communicate information quickly and intuitively, enhancing the user experience.

When to Use Calendar Icons

Calendar icons are ideal for:

  • Date Selection: When users need to pick a specific date, such as for booking events or selecting deadlines.
  • Timeline Visualization: To represent chronological progress or deadlines in a timeline.
  • Reminders and Notifications: To alert users about upcoming events or due dates.
  • Event Management: In applications where users manage meetings, appointments, or other date-based activities.

2. Choosing the Right Calendar Icon Style

calendar icons

The style of your calendar icon should align with your overall design system and branding. Consider these factors when selecting a style:

Consistency with Design System

Ensure the calendar icon’s style matches the rest of your UI elements. This consistency helps maintain a cohesive look and feel throughout your application.

Simplicity and Clarity

Calendar icons should be easy to recognize and interpret at a glance. Avoid overly complex designs that might confuse users. The icon should quickly convey its purpose without additional explanation.

Color and Contrast

Choose colors that stand out against the background while aligning with your branding. Ensure the icon is visible to users with varying levels of visual acuity, considering accessibility guidelines.

Variations for Different States

Design different versions of the calendar icon to indicate various states, such as active, inactive, hover, or selected. This variation enhances interactivity and guides user behavior.

3. Placing Calendar Icons in the UI

The placement of calendar icons within the user interface is crucial for usability and clarity. Here are some guidelines to ensure effective placement:

Positioning Near Date-Related Features

Place calendar icons near elements that involve dates, such as date pickers, event lists, or scheduling features. This positioning creates a logical connection between the icon and its function.

Accessibility Considerations

Ensure that the calendar icon is easily accessible, especially in mobile applications. Consider thumb reach on mobile devices when determining the placement.

Alignment with User Flow

Place calendar icons where users expect them. If the calendar icon is used for date selection, position it near input fields or buttons related to date-based interactions. This alignment improves user flow and reduces confusion.

Responsive Design

Ensure the placement of calendar icons is flexible and works well across different screen sizes and devices. Test the design on various platforms to ensure consistency.

4. Enhancing User Interaction with Calendar Icons

To create engaging user experiences, consider how users interact with calendar icons and related elements. Here are some tips to enhance user interaction:

Interactive Date Pickers

When using calendar icons for date selection, implement interactive date pickers. These components allow users to choose dates from a visual calendar, providing a more intuitive experience compared to manual date input.

Hover and Click Feedback

Provide visual feedback when users hover over or click on the calendar icon. This feedback can be in the form of color changes, animations, or other visual cues that indicate interactivity.

Tooltips and Contextual Information

To enhance user understanding, consider adding tooltips or contextual information when users hover over the calendar icon. This approach can help explain the icon’s purpose or provide additional instructions.

Keyboard Accessibility

Ensure the calendar icon and related interactive elements are accessible via keyboard navigation. This feature is crucial for users with motor impairments and contributes to overall accessibility.

5. Integrating Calendar Icons into Design Systems

calendar icons

A well-structured design system can help ensure consistent use of calendar icons across your UI. Consider these approaches to integrate calendar icons into your design system:

Creating Icon Libraries

Develop a library of commonly used icons, including calendar icons. This library should include different styles, variations, and sizes to accommodate various use cases.

Documenting Guidelines

Document guidelines for using calendar icons within your design system. Include information on placement, color, interaction, and accessibility requirements. These guidelines help maintain consistency across your design team.

Collaboration with Developers

Work closely with developers to ensure that the design and functionality of calendar icons are properly implemented. Collaboration can help avoid discrepancies between design and development.

Accessibility Compliance

Ensure that calendar icons and related components meet accessibility standards, such as the Web Content Accessibility Guidelines (WCAG). Compliance with these standards ensures your UI is usable by a wider audience.

6. Examples of Effective Calendar Icon Usage

To inspire your own designs, let’s explore some examples of effective calendar icon usage:

Google Calendar

Google Calendar uses a simple calendar icon in its UI to represent date-related interactions. The icon is consistent with Google’s design system and provides clear visual feedback during interactions.

Airbnb

Airbnb incorporates calendar icons to help users select booking dates. The icons are positioned near the date input fields and trigger interactive date pickers, providing an intuitive user experience.

Trello

Trello uses calendar icons to indicate deadlines and due dates within its task management boards. The icons are clear and provide visual cues for users to manage their tasks effectively.

Conclusion

Calendar icons are valuable tools in UI design, helping users understand and interact with date-related features. By following best practices for style, placement, and interaction, you can create user interfaces that are both visually appealing and highly functional. Incorporate calendar icons into your design system, collaborate with developers, and ensure accessibility compliance to create a seamless user experience. With these tips, you’re well on your way to creating intuitive and engaging UI designs that effectively leverage calendar icons.

Accessibility Considerations for Settings Icons: A Comprehensive Guide

In the realm of user interface (UI) design, icons play a crucial role in creating intuitive and efficient user experiences. Settings icons, in particular, are fundamental to applications, allowing users to customize, configure, and personalize their environment. However, designing these icons with accessibility in mind is often overlooked, leading to barriers for users with disabilities. This blog post aims to provide UI designers with comprehensive insights into accessibility considerations for settings icons to create more inclusive digital experiences.

Why Accessibility Matters for Settings Icons

Settings icons

Accessibility in UI design ensures that users with disabilities can effectively interact with digital interfaces. For settings icon, this means designing for people with visual impairments, motor disabilities, cognitive limitations, and other disabilities. The following reasons underscore the importance of accessibility in this context.

  1. Inclusivity. An accessible design is an inclusive design. Ensuring everyone, regardless of ability, can navigate and understand your settings icons creates a more equitable experience.
  2. Compliance. Many regions have legal requirements for digital accessibility, like the Americans with Disabilities Act (ADA) in the U.S. and the Web Content Accessibility Guidelines (WCAG) globally. Failure to comply can lead to legal repercussions.
  3. Enhanced User Experience. Accessibility benefits all users, not just those with disabilities. It fosters better usability, clarity, and user satisfaction.

Key Accessibility Considerations for Settings Icons

To design accessible settings icons, UI designers should consider several factors, from color contrast to iconography. Here’s a breakdown of the essential considerations.

1. Color Contrast

Color contrast is a critical factor in accessibility. Icons that lack sufficient contrast can be challenging to see for users with low vision or color blindness. To ensure your settings icons meet accessibility standards, consider the following.

  • WCAG Guidelines. WCAG 2.1 recommends a minimum contrast ratio of 3:1 for UI components and graphical objects, with a higher ratio of 4.5:1 preferred for text-based elements.
  • Use of Color. Avoid relying solely on color to convey information. If a settings icon changes color to indicate a state (e.g., active/inactive), include additional visual cues like shape changes or text labels.

2. Iconography and Symbolism

Icons should be easily recognizable and understood by a diverse audience. Ambiguity or cultural bias in iconography can create confusion. Here are some best practices.

  • Universally Recognized Icons. Use widely accepted symbols for settings, such as a gear or wrench. This familiarity helps users understand the icon’s function.
  • Consistency. Maintain consistent iconography throughout your design. If a gear represents settings in one area, it should represent the same concept elsewhere.
  • Clarity. Avoid overly intricate or complex icons. Simple, clear symbols are easier to understand.

3. Size and Spacing

The size and spacing of icons can impact accessibility, particularly for users with motor disabilities. Consider these guidelines.

  • Touch Targets. Ensure touch targets are large enough to accommodate users with limited motor control. A minimum size of 44×44 pixels is recommended for touch interactions.
  • Spacing. Provide sufficient spacing between icons to reduce the risk of accidental taps or clicks.

4. Screen Readers and Text Descriptions

Screen readers are essential for users with visual impairments. Providing accessible text descriptions for settings icons is crucial for compatibility with screen readers. Here’s what you should consider.

  • Alternative Text. Use descriptive alt text or aria-labels for settings icons to ensure screen readers convey the correct information. The text should be concise yet descriptive enough to communicate the icon’s purpose.
  • Semantic HTML. Use appropriate semantic HTML elements to ensure screen readers understand the context and hierarchy of your UI.

5. Interaction and Feedback

Accessible settings icons should provide clear feedback when interacted with. This is important for users with motor disabilities and cognitive limitations. Here’s what to focus on.

  • Feedback Mechanisms. Provide clear visual and auditory feedback when an icon is clicked or tapped. This could include color changes, animations, or audible cues.
  • Keyboard Accessibility. Ensure settings icons are accessible via keyboard navigation. This includes tab focus, appropriate keyboard shortcuts, and visible focus indicators.
  • Error Prevention and Handling. Design settings interactions to minimize errors, and provide clear instructions for error correction if needed.

6. Testing and User Feedback

Finally, testing and user feedback are essential for ensuring accessibility. Engage users with disabilities in your testing process to identify potential issues and gather insights for improvement. Here are some best practices.

  • Accessibility Testing Tools. Use tools like Axe, Wave, or Lighthouse to identify accessibility issues in your design.
  • User Testing. Conduct usability tests with a diverse group of users, including those with disabilities, to gather feedback on your settings icons’ accessibility.
  • Iterate and Improve. Use feedback to iterate on your design and improve accessibility. Remember, accessibility is an ongoing process, not a one-time fix.

Conclusion

Settings icons

Designing accessible settings icons is a critical component of creating inclusive digital experiences. By considering factors like color contrast, iconography, size, screen reader compatibility, interaction feedback, and user testing, UI designers can create settings icons that are accessible to all users. This not only improves usability for people with disabilities but also enhances the overall user experience for everyone.

As UI designers, let’s commit to making accessibility a central part of our design process. By doing so, we can ensure that settings icons—and the broader digital environments they inhabit—are accessible, inclusive, and user-friendly for all.

10 Creative Uses for Heart Icons in Graphic Design

Graphic design is an ever-evolving field that merges art with technology to communicate ideas and emotions. One iconic symbol that has stood the test of time is the heart icon. From ancient cave paintings to modern digital designs, the heart has been used to represent love, passion, and humanity. In this blog post, we’ll explore 10 creative uses for heart icons in graphic design and discuss how they can add warmth and emotion to various projects.

1. Logo Design with a Heart

When creating a logo, incorporating a heart icon can instantly convey feelings of love, care, and compassion. Many brands in the healthcare, wellness, or charity sectors use heart icons to symbolize their mission and connect with their audience on an emotional level. Consider the American Heart Association’s logo, which features a stylized heart with a torch, representing both health and enlightenment.

How to Use It

When designing a logo, experiment with different heart styles and shapes to see which aligns best with your brand’s identity. A minimalist heart may work well for a tech startup, while a more intricate design could be suitable for a luxury brand.

2. Social Media Icons with Heart

Social media platforms often use heart icons to indicate “likes” or “favorites.” This universal symbol of approval has become synonymous with positive interactions and can encourage users to engage with content. The heart icon’s simplicity and immediate recognition make it an ideal choice for social media applications.

How to Use It

If you’re designing social media assets, consider incorporating heart icons to encourage user engagement. You can use hearts to represent likes, favorites, or other positive interactions. Experiment with different colors and animations to create a dynamic experience for users.

3. Heart Icons in Infographics

heart icons

Infographics are a powerful tool for presenting complex information in an easily digestible format. Heart icons in infographics can be used to represent data related to health, relationships, or emotions. They add a visual element that can make the information more relatable and engaging.

How to Use It

When creating infographics, use heart icons to symbolize health statistics, emotional responses, or relationship data. For example, you can use a series of hearts to represent different levels of satisfaction or a heart with a pulse line to indicate health metrics.

4. Heart-Themed Web Design

Web design often involves creating a cohesive and visually appealing user experience. Heart icons can be used to add warmth and humanity to a website, making it more inviting to visitors. They can be incorporated into various elements, such as buttons, icons, or backgrounds, to create a consistent theme.

How to Use It

Incorporate heart icons into your web design to create a friendly and welcoming atmosphere. Use hearts as icons for interactive elements like “add to favorites” or “save for later.” Consider adding subtle heart motifs to backgrounds or banners to tie the theme together.

5. Heart Icons in Print Design

Print design encompasses a wide range of materials, from brochures and flyers to business cards and posters. Heart icons can be used to add a touch of emotion and connection to these printed materials, making them more memorable and impactful.

How to Use It

When designing print materials, consider using heart icons to draw attention to specific sections or to create a sense of unity. For example, you could use a heart icon as a bullet point in a list of benefits or as a decorative element on a business card.

6. Heart Icons in Email Campaigns

Email marketing campaigns are a vital tool for reaching customers and clients. Heart icons can be used to add a personal touch and increase engagement. They can be used to highlight special offers, express gratitude, or encourage readers to take action.

How to Use It

Incorporate heart icons into your email campaigns to create a more personalized and engaging experience. Use hearts to emphasize key messages, such as “thank you” or “we care about you.” You can also use heart icons in call-to-action buttons to make them more inviting and encourage clicks.

7. Heart-Themed Merchandise Design

Merchandise design allows brands to create tangible products that represent their values and appeal to their audience. Heart icons are a popular choice for merchandise, as they can be used to create items that evoke emotion and connect with customers.

How to Use It

When designing merchandise, consider using heart icons to create items that resonate with your audience. T-shirts, mugs, and tote bags with heart designs can be popular gifts or promotional items. Experiment with different styles and colors to create unique and appealing merchandise.

8. Heart Icons in Mobile Apps

heart icons pack

Mobile apps are a central part of modern life, and heart icons can be used to enhance the user experience. They can represent user preferences, encourage social interactions, or add a playful element to the app’s design.

How to Use It

Incorporate heart icons into your mobile app design to create a more user-friendly experience. Use hearts to indicate “likes” or “favorites,” or as interactive elements in gamified features. Consider adding animated heart icons to make the app more engaging and fun.

9. Heart-Themed Branding

Heart-themed branding involves creating a cohesive identity for companies and brands. Heart icons can be used to add a sense of community and connection, making your brand more memorable and enjoyable for everyone.

How to Use It

Use heart icons in your branding to create a welcoming atmosphere. Incorporate hearts into logos, banners, and promotional materials.

10. Heart Icons in Typography

Typography is a crucial element in graphic design, and heart icons can be used to add a playful or decorative touch to text. They can be used to create unique lettering or to highlight specific words or phrases.

How to Use It

Incorporate heart icons into your typography to create eye-catching text. Use hearts to replace letters in words or to create custom lettering styles. You can also use heart icons as decorative elements in headings or titles to add a touch of whimsy.

Heart icons are a versatile and enduring symbol in graphic design. Whether you’re creating logos, web designs, or merchandise, incorporating heart icons can add warmth and emotion to your projects. By exploring these 10 creative uses, you can discover new ways to connect with your audience and make your designs more memorable. So, go ahead and embrace the heart icon’s universal appeal in your next graphic design project.

Also, check our posts about settings, calendar, and check icons.

Star Icons in UI/UX Design: A Guide to Their Uses and Significance

In the realm of user interface (UI) and user experience (UX) design, icons play a pivotal role. They serve as visual shortcuts, guiding users through an application or website with minimal text. Among the many icons that are widely recognized, star icons hold a special place. They are simple yet versatile, and can convey a variety of meanings depending on the context in which they are used. In this blog post, we will explore the significance of star icons in UI/UX design, their common uses, and best practices for integrating them into digital products.

The Symbolism of Star Icons

The star symbol has a deep-rooted cultural and historical significance. Throughout history, stars have been used to represent quality, success, and guidance. In religious contexts, they symbolize divinity and hope. These connotations make star icons ideal for conveying a sense of excellence or quality in the digital realm.

In UI/UX design, the star icon can represent various concepts such as:

  • Rating and Reviews: The star icon is perhaps most commonly associated with rating systems. It is used to represent user feedback on products, services, or content.
  • Favorites and Bookmarks: Stars are often used to denote favorite items or bookmarked content, indicating that a user has marked something for easy access.
  • Achievements and Rewards: In gamification, stars represent achievements and rewards, adding an element of accomplishment to the user experience.

Common Uses of Star Icons in UI/UX Design

Let’s delve deeper into some of the most common uses of stars in UI/UX design.

1. Rating Systems

Star icons are almost synonymous with rating systems. When you think of online reviews, whether it’s for a product, restaurant, or movie, star ratings immediately come to mind. A common approach is to use a five-star system, where users rate a product or service by selecting the number of stars that reflect their opinion. This system is intuitive and easy to understand, making it a popular choice for user-generated feedback.

2. Favorites and Bookmarks

Another widespread use of star icons is to indicate favorite items or bookmarked content. In many applications, a star icon allows users to mark specific content, such as an article, video, or image, for quick access later. This feature enhances the user experience by providing a convenient way to save and retrieve content.

3. Achievements and Rewards

Star icons also play a significant role in gamification, where they represent achievements, badges, or rewards. This use is common in educational apps, fitness trackers, and games, where users earn stars for reaching milestones or completing tasks. The visual impact of star icons makes them effective in motivating users to engage with the product and achieve their goals.

Best Practices for Using Star Icons in UI/UX Design

While star icons are versatile, it’s essential to use them thoughtfully and strategically. Here are some best practices to consider when integrating star icons into your UI/UX design:

1. Consistency in Meaning

Ensure that star icons are used consistently throughout your application or website. If you use stars to represent ratings, don’t use them elsewhere for a different purpose. Consistency helps users understand the meaning of icons without confusion.

2. Clear Visual Hierarchy

When using star icons, consider their placement within the visual hierarchy of your design. For example, if stars are used for ratings, they should be prominently displayed near the item being rated. This ensures that users can quickly identify and understand their significance.

3. Accessibility and Readability

Icons should be accessible to all users, including those with visual impairments. Ensure that star icons have sufficient contrast and are large enough to be easily seen. Additionally, consider providing text labels or alternative text for users who rely on screen readers.

4. User Feedback and Testing

Before finalizing your design, gather user feedback and conduct usability testing to ensure that star icons are well understood. This step can reveal potential confusion or misinterpretation, allowing you to make necessary adjustments.

Innovative Uses of Star Icons

In addition to their traditional roles in rating systems, bookmarks, and gamification, star icons have also found their way into innovative applications within UI/UX design. One emerging trend is the use of stars to represent milestones or progress within a process or journey. For example, in onboarding experiences, a series of star icons could visually indicate a user’s progress as they complete different steps, providing a sense of accomplishment and motivation to continue. This approach leverages the symbolic nature of stars to encourage users to achieve their goals.

Another innovative use of star icons is in feedback loops and user engagement in the form of GIFs. In some applications, star icons can be used to represent a user’s reputation or contribution level within a community. For instance, in collaborative platforms or social networks, a star icon might indicate a top contributor or a highly regarded member. This use of stars creates a sense of hierarchy and recognition, encouraging users to participate actively and positively. The key to successful implementation lies in ensuring that the star-based recognition system is fair, transparent, and encourages positive behavior within the user community.

Conclusion

Star icons are a valuable tool in UI/UX design, offering a simple yet powerful way to convey various concepts such as ratings, favorites, and rewards. By following best practices and ensuring consistency, you can create a seamless user experience that resonates with your audience. Whether you’re designing a mobile app, a website, or a digital game, star icons can be a key element in enhancing usability and user satisfaction.

Also, check posts about settings, calendar, check mark icons, and tutorial on how to draw a star

Master Flutter Icons: A Comprehensive Guide

Let’s face it; icons are the unsung heroes of any user interface. Can you imagine navigating through an app without these little visual cues? Exactly! Now, speaking of icons, Flutter—a Google’s UI toolkit—makes implementing them a walk in the park. So, what’s cooking in Flutter’s kitchen when it comes to icons? Let’s dive in!

Why Choose Flutter Icon Implementation?

If you’re wondering why you should opt for Flutter for your icon needs, the reasons are manifold. Here are some key advantages that make Flutter a go-to option:

1. A Rich Library of Pre-Designed Icons

Flutter comes packed with a plethora of pre-designed icons ready for you to use. These include Material Icons, which are Android-style icons, and Cupertino Icons, which are iOS-style icons. No need to waste time designing icons from scratch unless you really want to!

2. Flexibility to Create Custom Icons

Flutter doesn’t just stop at giving you pre-made icons; it goes the extra mile. You have the ability to design your own icons using vector graphics like SVG or raster graphics like PNG. This is particularly helpful when you want your app’s icons to maintain brand consistency.

3. Cross-Platform Capability

Write once and run everywhere—this is the beauty of Flutter. Whether your application is for Android, iOS, or even web, you can use the same code base. This makes it easier for developers since you don’t have to maintain multiple sets of icons for different platforms.

4. Easy to Implement

Flutter makes it almost effortless to implement icons. With just a couple of lines of code, you can add an icon and customize its size, color, and more. The framework also provides intuitive properties and methods to modify icons easily.

5. Seamless Animations

Want to animate your icons? Flutter can do that too! You can add dynamic animations to your icons to make your app more interactive and engaging. This adds an extra layer of flair to your UI.

6. Community and Documentation

Last but not least, Flutter has an excellent community and documentation. If you run into any problems or need specific customizations, chances are someone has already found a solution or guide for it.

So, in summary, Flutter offers not just a rich library of icons but also the flexibility, ease of implementation, and cross-platform advantages that can significantly ease the development process. Whether you’re an experienced developer or a newbie, you’ll find Flutter’s capabilities in icon implementation to be incredibly useful.

Basic Understanding of Flutter Icons

Before we dig deep, let’s get acquainted with the basics. In Flutter, the core components for displaying icons are IconData and Icon classes.

  • IconData: This represents the actual icon data.
  • Icon Class: This is the UI element you interact with on the screen.

Types of Flutter Icons

When it comes to enhancing your Flutter app’s user interface with icons, you have multiple options at your disposal. Knowing what types of icons you can use and how they fit into different design philosophies can really elevate your app’s user experience. Here are the primary types of icons you’ll encounter in Flutter:

Material Icons

Material Icons are based on Google’s Material Design guidelines, and they’re the default set of icons in Flutter for Android applications. They have a modern, clean look and cover a wide range of subjects, from navigation and action to emojis and more.

Key Features:

  • Broad Range of Options: Over 900 icons to choose from.
  • Easy to Implement: Can be directly incorporated through Flutter’s Icon widget.
  • Customizable: You can easily adjust the size, color, and other parameters.

Use Case: Ideal for apps that aim to adhere to Material Design guidelines, or generally, Android apps.

Cupertino Icons

Cupertino Icons offer an iOS flavor. These are the Flutter equivalent of Apple’s SF Symbols and help you create an authentic iOS look and feel in your app.

Key Features:

  • iOS Look and Feel: Designed to mimic native iOS icons.
  • Simple to Use: Similar to Material icons, these can be easily integrated into your Flutter app.
  • Customizable: You can change aspects like color and size.

Use Case: Perfect for apps targeting iOS users or aiming to replicate Apple’s design language.

Custom Icons

Sometimes the pre-designed icons just won’t cut it, and you want something that’s uniquely you. Flutter provides the option to create your own custom icons.

Key Features:

  • Full Control: Create icons that fit your exact specifications.
  • Various Formats: Import SVG files for vector graphics or PNG for raster graphics.
  • Unique Branding: Perfect for when you want icons that align closely with your brand identity.

Use Case: When you need very specific icons that Material or Cupertino sets don’t offer, or when you need to adhere to specific branding guidelines.

So there you have it—a quick rundown of the types of icons available in Flutter. Whether you’re looking for the simplicity of Material Icons, the iOS aesthetic of Cupertino Icons, or the uniqueness of Custom Icons, Flutter has got you covered.

How to Use Material Icons

How to Use Material Icons

Material icons are the quintessential choice for any Android app or design that’s inspired by Google’s Material Design guidelines. They’re simple, intuitive, and highly customizable. Here’s how you can get started with using Material icons in your Flutter app.

Implementation Steps:

  1. Import the Material PackageThe first step is to make sure you import Flutter’s Material package into your Dart file. If you’ve created a new Flutter project, the package should already be part of your pubspec.yaml file. Add the following line at the top of your Dart code file:
    dart
    import 'package:flutter/material.dart';
  2. Use the Icon Widget and Specify the Icon DataNext, you can utilize the Icon widget to display an icon. The Icon widget takes an IconData object that defines which icon to show. Here’s a simple example that uses the “home” Material icon:
    dart
    Icon(Icons.home)

Properties:

You can customize Material icons using various properties. Here are some of the most commonly used ones:

  1. Size: The size property lets you define the dimensions of the icon. For example, to set an icon size to 30, you’d write:
    dart
    Icon(Icons.home, size: 30.0)
  2. Color: With the color property, you can change the icon’s color. To set the icon color to blue, you’d do:
    dart
    Icon(Icons.home, color: Colors.blue)
  3. Semantic Labels: If you’re aiming for accessibility, you can use the semanticLabel property to define a description that screen readers can read out:
    dart
    Icon(Icons.home, semanticLabel: 'Home')

Example Code

Putting it all together, you could have a complete Icon widget like this:

dart
Icon(
Icons.home,
size: 30.0,
color: Colors.blue,
semanticLabel: 'Home',
)

Using Material icons in your Flutter application is a straightforward process that adds both aesthetic and functional value. Whether you’re sticking with the default settings or customizing the icons to match your app’s theme, you can do it all with just a few lines of code.

How to Use Cupertino Icons

iOS developers, fret not! Cupertino icons are here to save the day.

Implementation Steps:

  1. Import the Cupertino package.
  2. Use the Icon widget with Cupertino icons.

Properties:

  • Size
  • Color

Creating Custom Icons

Got a specific vision? Create your custom icons!

  • From SVG
  • From PNG

Common Pitfalls and Their Solutions

When working with Flutter icons, especially if you’re new to the platform, you might encounter some issues that can be frustrating. However, the good news is that these problems usually have straightforward solutions. Let’s take a look at some common pitfalls.

1. Icons Not Displaying

When you find that an icon is not displaying as expected, it can be quite baffling. Here are some common reasons and their solutions:

  1. Missing Import: Make sure you’ve imported the Material or Cupertino package, depending on the type of icons you’re using.Solution: Add the appropriate import statement at the top of your Dart file.
    dart
    import 'package:flutter/material.dart'; // for Material icons
  2. Wrong IconData: Ensure you’re using the correct IconData corresponding to the icon you want to display.Solution: Double-check the icon name from the official documentation and make sure you’ve spelled it correctly.
  3. Parent Widget Constraints: Sometimes the parent widget may have constraints that prevent the icon from being displayed.Solution: Modify or remove the constraints on the parent widget to give the icon enough space.

2. Wrong Icon Size or Color

If the icon is displaying but looks different from what you expected, size and color are the usual culprits. Here’s how you can troubleshoot:

  1. Size Issues: If the icon size is not as you expected, make sure you’ve set the size property correctly.Solution: Double-check the size property in the Icon widget. It should look something like this:
    dart
    Icon(Icons.home, size: 30.0)
  2. Color Mismatch: If the color isn’t right, you may not have set the color property correctly.Solution: Confirm you’ve correctly set the color property. Here’s how it should look:
    dart
    Icon(Icons.home, color: Colors.blue)

Even though Flutter makes it pretty straightforward to implement and customize icons, you might still run into a few hiccups along the way. The key is to identify the root cause—be it a missing import, incorrect icon data, or improper customization—and apply the corresponding solution. Armed with this troubleshooting guide, you should be able to navigate through most issues you’ll encounter with Flutter icons.

Importance of Icon Consistency

To keep your UI intuitive:

  • Stick to design principles.
  • Prioritize accessibility.

Testing Your Icons

Once you’ve added icons to your Flutter app, you might think you’re all set. However, it’s essential to thoroughly test how those icons appear and behave across different devices and orientations.

Why Test?

  • Different Display Sizes: Icons might appear differently on tablets compared to smartphones.
  • Orientation Changes: Switching between portrait and landscape can affect how icons are displayed.
  • Platform Variations: Android and iOS might render icons differently.

How to Test?

  1. Real Devices: Nothing beats real-world testing. Run your app on various devices that your target audience is likely to use.
  2. Emulators and Simulators: Use emulators for Android and simulators for iOS to test how your icons look and function.
  3. Cross-Browser Testing: If your Flutter app is also a web application, make sure to test it on different web browsers.

Best Practices for Flutter Icons

As you work with icons in Flutter, there are some golden rules you should adhere to:

Sizing

Consistency is key when it comes to sizing. Make sure your icons are of a uniform size where they’re supposed to be. If you do need various sizes, make sure they make sense in their respective contexts.

Tips:

  • Use scalable vector graphics (SVG) when possible to ensure high quality at any size.
  • Consider the layout and how the icon’s size affects usability and aesthetics.

Coloring

The color of your icons should align with your app’s overall design scheme. Poorly chosen colors can affect readability and user experience.

Tips:

  • Make sure the colors are accessible, meaning they should be easily visible to all users, including those with visual impairments.
  • Test your chosen colors under different lighting conditions to ensure they are readable.

Positioning

The placement of your icons should be both aesthetically pleasing and functional. Poorly placed icons can lead to user confusion.

Tips:

  • Make sure icons are placed in familiar positions based on platform guidelines (e.g., navigation icons at the bottom for iOS and at the top or bottom for Android).
  • Test the positioning by having users interact with the app and provide feedback.

Testing is a crucial but often overlooked aspect when adding icons to a Flutter app. Taking the time to run tests on different devices and orientations can save you from headaches down the road. Additionally, adhering to best practices in sizing, coloring, and positioning will contribute to a more successful and user-friendly application.

Icon Animation

Take your UI to the next level by adding animations.

  • Animated Icons Class
  • Other Techniques

Flutter Icons in Web and Desktop Applications

Flutter’s versatility extends beyond mobile platforms—it’s also a robust solution for web and desktop applications. So how can you make sure your icons look great across all platforms?

Web Applications

  1. SVG vs Raster: For web, SVG is often the preferred format as it scales beautifully at any size. You can use the flutter_svg package to integrate SVG icons in your Flutter web projects.
  2. Browser Compatibility: Test your icons on multiple web browsers to ensure they look consistent.
  3. Performance: Web apps can be accessed on devices with various capabilities, so it’s crucial to optimize icons for performance using lazy loading or other techniques.

Desktop Applications

  1. High DPI Support: Desktop displays often have higher DPI, and your icons need to be high-resolution to look crisp. Use vector graphics where possible.
  2. OS Guidelines: Each operating system (Windows, macOS, Linux) has its own UI guidelines. Make sure your icons align with these for a native feel.

Useful Tools and Resources

Mastering Flutter icons is easier when you have the right resources at your disposal. Here are some you might find useful:

  1. Flutter Icon Widgets Documentation: The best place to start. It offers a comprehensive guide and examples.
  2. Material Icons Library: Google’s own library is a fantastic resource for browsing available Material icons.
  3. IconMoon: If you’re looking into custom icons, IconMoon allows you to generate your own icon fonts and SVG files.
  4. Adobe Illustrator or Inkscape: For creating custom SVG icons, these are go-to tools for many designers.
  5. Color Contrast Checker: An essential tool for checking the readability of your chosen icon colors.
  6. Flutter DevTools: Offers a suite of debugging and inspection tools to test and analyze your Flutter apps, including how icons render.

Flutter isn’t just for mobile; it’s a cross-platform wonder. Whether you’re developing for web, desktop, or mobile, the framework has the flexibility to let you implement icons that look great everywhere. And with the right tools and resources, you can elevate your icon implementation to a professional level. Armed with this knowledge, you’re well on your way to becoming a Flutter icon expert.

Conclusion

Flutter has emerged as a versatile and powerful tool for creating not just mobile apps but also web and desktop applications. One of the many strengths of Flutter lies in its rich support for icon implementation, offering you the flexibility to make your apps visually striking and functionally efficient.

Whether you’re using the readily available Material or Cupertino icons, customizing them to fit your specific needs, or even creating your own custom icons, Flutter offers you an unparalleled level of control and ease. With its cross-platform capabilities, you’re equipped to ensure consistent and appealing iconography across Android, iOS, web, and desktop platforms.

But remember, the path to creating an exceptional user interface doesn’t end at simply inserting an icon. Following best practices, performing thorough testing, and utilizing valuable tools and resources will make sure your icons are not just good but outstanding.

By mastering Flutter icons, you are making a meaningful investment in the user experience and overall quality of your applications. It’s an essential skill that will set you apart in the competitive landscape of UI/UX design.

So what are you waiting for? Dive in and start mastering Flutter icons today!

FAQs

1. What types of icons does Flutter support?

  • Flutter supports Material icons, Cupertino icons, and custom icons.

2. Why are my Flutter icons not displaying?

  • Common reasons include missing imports, incorrect icon data, and parent widget constraints. Make sure to troubleshoot based on these factors.

3. Can I use Flutter icons in web and desktop applications?

  • Absolutely, Flutter is a cross-platform framework that allows you to use icons in mobile, web, and desktop applications.

4. What are some best practices for using icons in Flutter?

  • Consistent sizing, aligned coloring, and strategic positioning are key best practices for using Flutter icons.

5. Are there any tools to help me master Flutter icons?

  • Yes, Flutter documentation, Material Icons Library, IconMoon, and design software like Adobe Illustrator or Inkscape can be highly beneficial.


Complete List of Flutter Icons and Their Uses

Flutter offers a rich assortment of icons for various purposes. The primary libraries include Material icons and Cupertino icons. Let’s explore some commonly used icons in each category and where you might see them used.

Material Icons

  1. Home (Icons.home)
    • Common Use: Navigation to the home page of an app.
  2. Search (Icons.search)
    • Common Use: Initiating a search query.
  3. Settings (Icons.settings)
    • Common Use: Accessing settings or preferences.
  4. Account Circle (Icons.account_circle)
    • Common Use: Representing user accounts or profiles.
  5. Favorite (Icons.favorite)
    • Common Use: To bookmark or like items.
  6. Camera (Icons.camera)
    • Common Use: Accessing the camera for photos or scans.
  7. Share (Icons.share)
    • Common Use: Sharing content through various platforms.
  8. Notification (Icons.notification_important)
    • Common Use: Highlighting new updates or alerts.
  9. Shopping Cart (Icons.shopping_cart)
    • Common Use: Representing a shopping cart in e-commerce apps.
  10. Location Pin (Icons.location_pin)
    • Common Use: Indicating locations on a map.

Cupertino Icons

  1. Left Chevron (CupertinoIcons.left_chevron)
    • Common Use: Navigation, usually to go back to the previous screen.
  2. Info (CupertinoIcons.info)
    • Common Use: Providing information or help.
  3. Heart (CupertinoIcons.heart)
    • Common Use: Favoriting or liking items.
  4. Chat Bubble (CupertinoIcons.chat_bubble)
    • Common Use: Accessing comments or chat features.
  5. Plus (CupertinoIcons.plus)
    • Common Use: Adding a new item or creating something new.
  6. Battery (CupertinoIcons.battery_100)
    • Common Use: Indicating battery levels.
  7. Clock (CupertinoIcons.clock)
    • Common Use: Displaying time-related information.
  8. Wifi (CupertinoIcons.wifi)
    • Common Use: Indicating network status.
  9. Trash (CupertinoIcons.trash)
    • Common Use: Deleting items.
  10. Volume Up (CupertinoIcons.volume_up)
    • Common Use: Controlling audio volume.

Flutter provides a vast array of icons through Material and Cupertino libraries to suit almost every need. Understanding the purpose of each icon helps in choosing the right one for your application, improving both functionality and user experience. With this knowledge, you’re one step closer to mastering Flutter icons!


How to Change Flutter Icon Color: Step-by-Step Guide

Changing the color of an icon in Flutter is quite straightforward, thanks to the flexibility of the framework. Follow these steps to customize your icons’ colors:

Step 1: Import the Required Packages

First things first, make sure you’ve imported the Flutter Material package in your Dart file:

dart
import 'package:flutter/material.dart';

Step 2: Use the Icon Widget

The next step involves using the Icon widget. For demonstration purposes, let’s consider you’re using the home icon from the Material library.

dart
Icon(Icons.home)

Step 3: Add the Color Property

The Icon widget has a color property that you can set to change the color of the icon. For example, if you want to set the icon color to blue, you can do this:

dart
Icon(Icons.home, color: Colors.blue)

Step 4: Run the App

After you’ve added the color property, save your Dart file and run the app. You should see that the home icon is now blue.

Step 5: Dynamic Color Changes

If you want to change the color dynamically, say, when a user clicks on the icon, you can use a GestureDetector or InkWell widget for capturing tap events.

Here’s how you can do it with setState:

dart

Color iconColor = Colors.blue;

// In your build method
GestureDetector(
onTap: () {
setState(() {
iconColor = Colors.red; // Change the color upon tap
});
},
child: Icon(Icons.home, color: iconColor),
)

Step 6: Validate

Always remember to test the color changes across different devices and light/dark themes to ensure that the color is universally compatible and accessible.

And that’s how you change the color of an icon in Flutter! With just a few lines of code, you can dynamically adapt your UI elements to provide a richer user experience. Whether it’s to adhere to a specific theme, indicate a state change, or highlight an interactive element, modifying icon colors is an effective way to convey meaning and enrich your app’s design. So go ahead, splash some color onto your icons!

Common Flutter Icon Issues and Fixes

Flutter is a robust framework, but like any technology, it’s not completely free from pitfalls, especially for beginners. Here are some common issues developers encounter when implementing icons and their respective fixes.

Issue 1: Icon Not Displaying

  • Common Causes: Missing imports, typos in icon names, incorrect usage of custom icons.
  • Fix: Double-check your imports and the icon name. For custom icons, ensure you’ve added them properly in your pubspec.yaml file and run flutter pub get.
dar
// Make sure you've imported Material or Cupertino libraries
import 'package:flutter/material.dart';

Issue 2: Icon Size Issues

  • Common Causes: Not specifying a size, parent widget constraints.
  • Fix: Use the size property to set the icon size explicitly. If that doesn’t work, check the constraints of the parent widget.
dart
Icon(Icons.home, size: 30.0)

Issue 3: Icon Color Not Changing

  • Common Causes: Conflicting parent widget properties, incorrect usage of Theme.
  • Fix: Make sure no parent widgets like IconButton or Theme are overriding your icon’s color.
dart
// Double-check if a parent widget is overriding the color
IconButton(
icon: Icon(Icons.home, color: Colors.blue),
color: Colors.red, // This will override the inner icon color
onPressed: () {},
)

Issue 4: Icons Look Distorted

  • Common Causes: Incorrect aspect ratio, using a non-square custom icon.
  • Fix: Ensure the custom icon image is square and the aspect ratio is correct. Double-check any custom BoxFit properties.

Issue 5: Icon Animation Jitters

  • Common Causes: Unoptimized animations, not using built-in animated widgets.
  • Fix: Use Flutter’s built-in animated widgets like AnimatedIcon.
dart
AnimatedIcon(
icon: AnimatedIcons.menu_arrow,
progress: _animationController,
)

Issue 6: Icons Not Responsive Across Platforms

  • Common Causes: Hardcoded sizes and colors, not utilizing adaptive widgets.
  • Fix: Use media queries and theme data to make icons responsive and adaptable to both iOS and Android.

Issues related to icon implementation in Flutter are usually straightforward to solve. Most of the problems arise due to overlooking minor details or not being aware of the capabilities of the framework. With the solutions mentioned above, you’ll be well-equipped to tackle any icon-related challenges that come your way in Flutter.

Animating Flutter Icons: A Beginner’s Guide

Animations in Flutter are powerful yet straightforward to implement, particularly with built-in widgets designed to make life easier. Let’s break down the steps for animating Flutter icons.

Step 1: Import Necessary Packages

The first step is always to import the necessary Flutter packages.

dart
import 'package:flutter/material.dart';

Step 2: Initialize Animation Controller

Before you can animate anything, you need an AnimationController to control your animation sequences. Typically, you’ll initialize this in your initState() method.

dart

AnimationController _controller;

@override
void initState() {
super.initState();
_controller = AnimationController(
duration: Duration(seconds: 1),
vsync: this,
);
}

Make sure your widget extends TickerProviderStateMixin or use a mixin that provides a Ticker.

Step 3: Use AnimatedIcon Widget

Flutter provides an AnimatedIcon widget specifically for animating icons. Use the AnimatedIcon widget and link it with the Animation Controller.

dart
AnimatedIcon(
icon: AnimatedIcons.menu_arrow,
progress: _controller,
)

Step 4: Start the Animation

You can start, stop, reverse, and even loop the animations using the _controller.

dart
// Start the animation
_controller.forward();
// Reverse the animation
_controller.reverse();

// Loop the animation
_controller.repeat();

Step 5: Control the Animation in UI

You can control the animation using Flutter’s interaction widgets like GestureDetector, InkWell, or even buttons. Here’s how to use a FloatingActionButton to control the animation.

dart
FloatingActionButton(
onPressed: () {
if (_controller.status == AnimationStatus.completed) {
_controller.reverse();
} else {
_controller.forward();
}
},
child: Icon(Icons.play_arrow),
)

Step 6: Cleanup Resources

Don’t forget to dispose of the _controller when the widget is no longer needed to free up resources.

dart
@override
void dispose() {
_controller.dispose();
super.dispose();
}

Conclusion

Animating icons in Flutter is a cakewalk, thanks to the framework’s robust animation support. With a few lines of code, you can make your static icons engaging and interactive, greatly enhancing the user experience. Whether you’re adding a touch of flair or aiming for highly complex animations, Flutter has got you covered.

Happy animating!

Fix: Flutter Icon Not Showing

When your Flutter icons don’t show up as expected, it can be frustrating and can compromise the look and feel of your app. Here are some common causes and their corresponding solutions.

Issue 1: Missing or Incorrect Import

  • Symptom: The icon is not displayed, and you get a console error about missing import.
  • Solution: Make sure you have imported the necessary package.
dart
import 'package:flutter/material.dart';

Issue 2: Incorrect Icon Name

  • Symptom: The icon doesn’t display, or a different icon is shown.
  • Solution: Verify that you are using the correct icon name. Flutter’s Material and Cupertino libraries are case-sensitive.
dart
// Correct
Icon(Icons.add)

// Incorrect
Icon(Icons.Add)

Issue 3: Custom Icons Not Added Properly

  • Symptom: Custom icons are not displayed.
  • Solution: Make sure you’ve correctly updated your pubspec.yaml file and run flutter pub get. Also, ensure that the asset path and file extension are correct.
yaml
flutter:
assets:
- assets/icons/

Issue 4: Parent Widget Constraints

  • Symptom: The icon is not displayed due to sizing constraints from the parent widget.
  • Solution: Ensure that the parent widget allows enough space for the icon to display. Use the size property to adjust the icon size if necessary.
dart
Icon(Icons.add, size: 50)

Issue 5: Not Using the Icon Widget

  • Symptom: Trying to display an icon through Image or Text widgets.
  • Solution: Always use the Icon widget for Material icons and CupertinoIcon for Cupertino icons. For custom icons, use the Image.asset or Image.network as required.
dart
// Correct
Icon(Icons.add)

// Incorrect
Text('add')

Issue 6: Incorrect ThemeData

  • Symptom: Icons not showing when a custom ThemeData is used.
  • Solution: Sometimes the app theme may conflict with the icon display. Make sure that your ThemeData is set up correctly.
dart
Theme(
data: ThemeData(
iconTheme: IconThemeData(
// Your customization
),
),
child: Icon(Icons.add),
)

Most issues related to icons not showing in Flutter stem from minor mistakes or oversights. These issues are easy to diagnose and fix, usually requiring just a few lines of code to rectify. Keep these common pitfalls and their solutions in mind the next time you find yourself grappling with invisible or incorrectly displayed icons in Flutter.

Ultimate Guide to SVG Loading Icons: Lightweight and Flexible

Hello there, web design enthusiasts and developers! Ever wondered how you can make your websites more engaging while they load? Well, that’s exactly what we’re diving into today. Buckle up as we go through the ins and outs of SVG Loading Icons!

What are SVG Loading Icons?

To fully understand SVG Loading Icons, it’s important to break it down into two components: SVG (Scalable Vector Graphics) and Loading Icons.

Expanded Definition of SVG

SVG or Scalable Vector Graphics offer a format that is truly revolutionary in the graphic world. How so? Well, think of a rubber band; no matter how much you stretch it, it doesn’t lose its shape. SVG operates on a similar principle. Being vector-based, you can scale these graphics up or down, and they never lose their quality.

But wait, there’s more. Because they are written in XML format, you can easily tweak their properties like color, shape, and even animations using JavaScript and CSS. So, you have a high degree of control over how they look and function.

Moreover, SVGs don’t require HTTP requests to load, unlike other image types like PNG or JPEG. This significantly reduces the load time, making them a perfect choice for high-performance websites.

Expanded Definition of Loading Icons

Loading Icons are like the drumrolls before a big reveal. They set the stage and keep the audience (in this case, your users) engaged. These are the tiny animations or graphics you see when a webpage is in the process of loading something—be it the entire page, an image, or a video.

Traditionally, these icons were created using GIFs or even JavaScript animations. However, these methods had their limitations, like poor scalability, higher resource consumption, or restricted customization.

When SVG is used for creating Loading Icons, you bring the best of both worlds together. You get the crispness and scalability of SVG and the engagement factor of a Loading Icon. It’s like having your cake and eating it too.

Imagine a user interface as a theatrical stage. Everything needs to be just perfect for the show (UI elements) to go on smoothly. Loading icons serve as the ‘curtain-raiser’ to this show, and using SVG for these icons ensures that this curtain-raiser is as engaging and efficient as possible.

Why Marrying SVG with Loading Icons is a Game-Changer

SVG Loading Icons offer a blend of aesthetics and performance that is unparalleled. They load faster, scale better, and can be as simple or as intricate as you like, without putting undue load on the user’s browser. They also offer a level of customization that allows you to make your loading icon truly unique and aligned with your brand’s identity.

To sum it up, SVG Loading Icons offer a lighter, more flexible, and engaging way to hold user attention during loading times, which, let’s face it, can sometimes be the most crucial moments in determining whether a user stays on your page or moves on.

Would you rather go to a show where the curtain gets stuck halfway, or one where it rises smoothly and swiftly to reveal the main attraction? That’s the power and importance of SVG Loading Icons in modern web design.

I hope this expanded explanation helps you understand the significance and utility of SVG Loading Icons in a better way.

Why Use SVG Loading Icons?

The digital landscape is incredibly competitive. Users are impatient; every millisecond counts. If your website takes too long to load, you risk losing potential customers. This is where SVG Loading Icons come in, offering two major advantages: lightweight features and incredible flexibility.

Lightweight Features Unpacked

Let’s delve into the “lightweight” aspect a bit more. Imagine you’re on a hiking trip. Would you rather carry a cumbersome bag that slows you down or a feather-light pack that lets you climb with ease? SVG loading icons are like that feather-light pack.

Reduced File Size

Traditional loading icons, especially animated ones, can sometimes have large file sizes, leading to slower load times. SVGs, on the other hand, have a much smaller file footprint. This is because SVGs are defined by mathematical equations rather than a grid of pixels. Thus, the browser can render the image more quickly, leading to quicker load times.

Optimized Performance

The lightweight nature of SVGs has a direct impact on your website’s performance. Because they’re easy to load, they reduce the lag time that your users experience. This is particularly beneficial for mobile users who may not always have the luxury of a high-speed internet connection.

Flexibility and Responsiveness Explained

Now, let’s talk about the second major advantage: flexibility and responsiveness.

Inherent Scalability

SVGs are not pixel-based, which means they can be scaled up or down without losing any quality. Whether your users are on a 4K monitor or a mobile device, SVG Loading Icons will look crisp and clean.

Easy Customization

Remember those old-school coloring books? They gave you the freedom to choose whatever color you liked for each shape. SVGs offer a similar level of customization. You can easily change their color, shape, and size with simple lines of code. You’re not stuck with a predefined animation; you can make the loading icon dance to your tunes.

Responsive Design

In the era of various screen sizes—smartphones, tablets, desktops—responsiveness is key. SVG Loading Icons adapt to the screen they are displayed on. So you don’t have to worry about your loading icon looking too small on a tablet or too large on a phone.

To sum it up, SVG Loading Icons offer a level of performance and adaptability that is unparalleled in the world of web design. They’re not just a step but a leap forward in ensuring that your user’s waiting time is not only bearable but also engaging and visually pleasing. And let’s be honest, in the fast-paced digital world, that can make all the difference.

How to Create SVG Loading Icons

Creating SVG Loading Icons: A Comprehensive How-To Guide

Using Software Tools: Adobe Illustrator or Inkscape

These design software tools are the crème de la crème for graphic artists and hobbyists alike. With a user-friendly interface, even a newbie can find their way around.

Step-by-Step Process in Adobe Illustrator
  1. Launch Adobe Illustrator and Create a New File: Choose the size you want for your loading icon. A typical size might be 50×50 pixels.
  2. Use Basic Shapes: Select from rectangles, circles, lines, or custom paths to start your design. These are found in the toolbar.
  3. Apply Colors and Strokes: After sketching out your shape, you can fill it with color and apply strokes for added effect.
  4. Save as SVG: Once your design is complete, go to File > Export > Export As and choose SVG as the format.
Step-by-Step Process in Inkscape
  1. Open Inkscape: Launch the software and create a new file.
  2. Draw Basic Shapes: Use the shape tools on the left sidebar to draw your shapes.
  3. Fill and Stroke: Just like in Illustrator, you can fill your shapes with color and apply strokes.
  4. Export as SVG: Once done, go to File > Save As and choose SVG as the file type.

Coding Them Yourself: For the DIY Enthusiasts

For those who like to control every pixel, coding your SVGs is a thrill equivalent to constructing a LEGO masterpiece, one block at a time.

Coding Basic Shapes in SVG

SVGs are essentially written in XML, a markup language that’s quite easy to understand. Here are some elements you can use:

  • Circles: To create a circle, you use the <circle> element and define the cx (center x-coordinate), cy (center y-coordinate), and r (radius).
    html
    <circle cx="25" cy="25" r="20" fill="green" />
  • Rectangles: The <rect> element is used for drawing rectangles. You can set the x, y, width, and height attributes.
    html
    <rect x="10" y="10" width="30" height="30" fill="blue" />
  • Lines: For lines, you’ll use the <line> element and set the x1, y1, x2, y2 coordinates.
    html
    <line x1="0" y1="0" x2="50" y2="50" stroke="black" />
Styling and Animating

Once your basic shapes are down, you can add styles and animations using CSS. For example, you can animate a circle to move across the screen or change its color over time.

Putting It All Together

Whether you choose to use a software tool or code your SVG Loading Icons yourself, the next step is integrating them into your website. This usually involves adding the SVG code into your HTML file or linking to an SVG file. A little CSS can then be used to position it correctly.

And there you have it, folks! You now know how to create your SVG Loading Icons using either a graphical software tool or good old-fashioned code. So, what’s stopping you? Start creating!

Customization of SVG Loading Icons: Making Them Truly Yours

Creating your SVG Loading Icons is just the tip of the iceberg. To make them uniquely yours, you can customize them in countless ways. Think of your SVG Loading Icon as a blank canvas, and customization as the brushstrokes that bring it to life. Below, we’ll delve into the two main facets of SVG customization: changing colors and animating SVG icons.

Changing Colors: Be the Chameleon of the Digital World

Chameleons are masters of adaptation, changing their colors to blend in or stand out. Similarly, you can easily change the colors of SVG icons to match the theme of your website or app. Here’s how you can do it:

Using Inline CSS

This is the most straightforward way to change colors. You simply include a style attribute within your SVG element. For example:

html
<circle cx="25" cy="25" r="20" style="fill:blue;" />
Using External CSS

If you have multiple SVG elements or want a cleaner code, using external CSS is the way to go. Assign a class to your SVG element and then define the styles in your CSS file.

html
<!-- HTML -->
<circle cx="25" cy="25" r="20" class="blue-circle" />
css
/* CSS */
.blue-circle {
fill: blue;
}

Animating SVG Icons: Give Them Life

Static icons are okay, but animated icons add a layer of engagement that’s hard to ignore. Whether you want a rotating gear or a bouncing ball, animation is a great way to elevate your SVG Loading Icons.

Using CSS Animations

CSS provides a simple way to add animations. For instance, to make a circle move from left to right, you could use:

css
@keyframes slide {
0% { transform: translateX(0); }
100% { transform: translateX(100px); }
}
.blue-circle {
animation: slide 2s infinite;
}
Using JavaScript for Advanced Animations

For more complex animations, JavaScript comes to the rescue. With JavaScript, you can control each aspect of the animation in real-time, reacting to user interactions or other events.

javascript
// Change circle color every 2 seconds
setInterval(function() {
const circle = document.querySelector('.blue-circle');
circle.style.fill = circle.style.fill === 'blue' ? 'green' : 'blue';
}, 2000);

Customizing SVG Loading Icons allows you to imbue them with personality and purpose. Changing colors and adding animations are just two ways to put your unique stamp on these versatile graphics. So go ahead, be a digital chameleon, and make your SVG Loading Icons as vibrant and dynamic as you are!

Case Studies: Who’s Using SVG Loading Icons Effectively?

Case Studies: Who’s Using SVG Loading Icons Effectively?

So you’re intrigued by the capabilities of SVG Loading Icons, but maybe you’re wondering if these advantages stand up in the real world. Well, guess what? Even tech giants like Google and Facebook vouch for the efficacy of SVG Loading Icons. Let’s dive into these case studies to see how these big players are optimizing their user experiences with SVG Loading Icons.

Google: Keeping It Simple Yet Engaging

Google is a behemoth in the tech world, but when it comes to design, they often stick to the mantra: less is more. If you’ve ever noticed the subtly animated, colorful Google ‘G’ while loading a Google service like Gmail or Google Drive, that’s an SVG Loading Icon right there.

Advantages
  • Speed: SVGs are lightweight, which complements Google’s need for speed.
  • Scalability: Whether you’re using a smartphone or a widescreen monitor, Google’s SVG icons look crisp.
  • Customization: Google takes advantage of SVG’s flexibility by employing different animations and colors based on the service you’re using.
Facebook: Making Every Second Count

Facebook, with its billions of active users, can’t afford to have you staring at a blank screen. That’s where SVG Loading Icons come into play. You’ve likely encountered these when a post or comment is loading, displayed as tiny, rotating gears or bouncing balls.

Advantages
  • User Engagement: The animations keep users entertained, making the loading time seem shorter.
  • Resource Efficiency: SVG icons require less bandwidth, which is crucial for a platform as large as Facebook.
  • Adaptability: Given Facebook’s multi-platform presence, SVGs help maintain a uniform look and feel, whether you’re on a PC, tablet, or mobile phone.

Conclusion for Case Studies

Both Google and Facebook showcase the compelling advantages of using SVG Loading Icons. From improving loading speeds to enhancing user engagement, SVG Loading Icons prove to be more than just a pretty face. Their real-world applications echo the benefits we’ve discussed earlier: they are lightweight, flexible, and incredibly customizable.

Takeaway

These case studies confirm that SVG Loading Icons are not just a fad; they’re a practical solution adopted by industry leaders. So, whether you’re a budding web developer or a seasoned designer, embracing SVG Loading Icons might just be the key to elevating your projects to new heights. After all, if they’re good enough for Google and Facebook, they’re probably good enough for the rest of us, wouldn’t you agree?

SVG Loading Icons are a lightweight, flexible, and incredibly effective way to engage users while your website or application loads. The endless customization options and scalability make them a go-to choice for modern web development.

Optimize Your Loading Icons for Faster Website Performance

Hey there, savvy webmaster! We both know how critical website speed is, not just for user experience but also for SEO rankings. But have you ever thought about the tiny details that could be affecting your website’s performance, like your loading icons? Let’s dig in.

Why You Need to Optimize Loading Icons

First impressions are everything, especially online. A slow or unresponsive website can deter potential customers within seconds. And guess what? Your loading icons play a huge role here. Besides, Google takes site speed into account when ranking your website, so you can’t afford to overlook anything, even the smallest of icons.

The Anatomy of Loading Icons: A Closer Look

What Constitutes a Loading Icon?

At first glance, loading icons appear as simple graphics meant to keep the user engaged while a website or application loads content. But behind the scenes, these visual elements consist of multiple components:

  1. Images: The visual part of the icon, usually vector-based to ensure high resolution.
  2. Code: Often scripted in CSS, JavaScript, or HTML5 to control the behavior and appearance of the icon.
  3. Animation: Some icons include animations like spinning or fading to make the waiting process less tedious.

Types of Loading Icons

Various types of loading icons serve different user experiences and functional purposes. Let’s explore some of the most commonly used types:

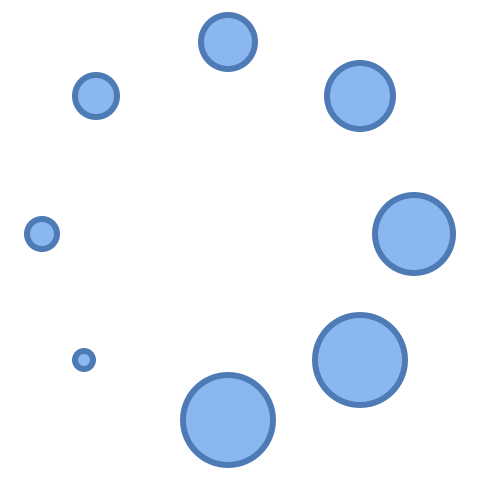
  1. Spinners: These are the circular icons that rotate continuously, providing a visual cue that something is happening in the background.
  2. Progress Bars: These are linear or circular indicators that fill up as the loading process progresses. They’re excellent for operations with a known duration.
  3. Skeleton Screens: Rather than a specific icon, these are placeholder layouts that give the user a sense of what the content will look like once it’s loaded.
  4. Custom Animations: These are tailor-made animations designed to align with a brand’s identity. They can range from simple moving shapes to complex animations.

Design Factors to Consider

When designing or choosing a loading icon, keep the following factors in mind:

  1. Size: The file size should be minimal to ensure fast loading.
  2. Compatibility: Ensure that your icon renders well on different devices and browsers.
  3. Relevance: The icon should match the theme and color scheme of your website or app for brand consistency.
  4. Complexity: A complicated, heavy animation might look cool but could defeat the purpose by slowing down the website.

Programming Languages Often Used

  1. CSS: Useful for simple animations and static icons.
  2. JavaScript: Offers more control over the behavior and timing of the icon.
  3. HTML5: Often used in conjunction with CSS and JavaScript for more complex and interactive icons.

Optimizing Loading Icons

  1. Compression: Always use compressed files to minimize load time.
  2. CDN: Utilize a Content Delivery Network for quicker access.
  3. Caching: Enable caching for frequent users to avoid re-loading the icon each time.

By understanding these facets of loading icons, you’ll be better equipped to choose or design an icon that not only looks good but also improves your website’s performance. Remember, the devil is in the details!

The Domino Effect of Unoptimized Loading Icons

Slowed Page Loading Time

An unoptimized loading icon may seem like a minor detail, but it can actually add precious seconds to your website’s loading time. This is particularly detrimental for mobile users or those with slower internet connections. For context, a one-second delay in page load time can lead to a 7% reduction in conversions, according to research.

Increased Bounce Rates

If your website takes too long to load, you risk losing visitors before they even have a chance to engage with your content. In the digital world, patience is a rare commodity. A loading delay directly increases the bounce rate, which is the percentage of visitors who navigate away after viewing only one page. High bounce rates are not just bad for business; they can also negatively impact your search engine rankings.

Negative Impact on SEO

Search engines like Google factor website speed into their ranking algorithms. If your site is slow, you’ll find it difficult to rank well, even if your content is top-notch. Unoptimized loading icons contribute to slower site speed, thereby affecting your SEO efforts.

User Experience Takes a Hit

Loading icons are not just for aesthetics; they serve a functional purpose by signaling to users that content is coming. A slow or glitchy loading icon can make users question the reliability of your website and may discourage them from returning in the future.

Brand Image Suffers

First impressions count, and a slow-loading website gives the impression of unprofessionalism or lack of attention to detail. Your brand image is at stake every time a visitor encounters a delay caused by something as seemingly trivial as a loading icon.

Strain on Server Resources

Large or complex loading icons can consume more server resources, leading to slower load times not just for the individual user, but potentially for all users accessing your site simultaneously. This can be disastrous during peak traffic hours or promotional events.

Mobile Users Get the Short End of the Stick

As mobile browsing continues to surge, the necessity for speedy loading increases. Unoptimized icons can be especially problematic for mobile users, who may already be dealing with slower load times due to network limitations.

How to Avoid These Issues

  1. Optimize File Size: Always compress your loading icons and opt for vector formats like SVG that maintain quality while minimizing file size.
  2. Use a CDN: Distribute your loading icons using a Content Delivery Network to speed up access for users around the globe.
  3. Enable Caching: This allows the browser to store the icon locally, speeding up subsequent visits from the same user.
  4. Test, Test, Test: Regularly check your website’s speed and make adjustments as needed.

By optimizing your loading icons, you can nip these issues in the bud and create a smoother, more enjoyable user experience that boosts conversions and enhances brand reputation. Every second counts, so start optimizing now!

How CDNs Supercharge Your Loading Icons

What is a CDN, Anyway?

A Content Delivery Network (CDN) is a system of distributed servers designed to deliver web content to users based on their geographical location. When you host your website’s assets, like images, JavaScript, and CSS files—including your loading icons—on a CDN, these files are copied across multiple servers around the world.

Localized Delivery: The Magic Trick

Here’s the game-changer: When a user visits your website, the CDN serves the files from the server closest to them. So if someone in London visits your U.S.-based website, the CDN will pull the files from a server in Europe, not from the U.S. This significantly speeds up the loading time because the data has less distance to travel.

The Benefits of Using CDN for Loading Icons

  1. Reduced Latency: Lower latency means your loading icon appears almost instantaneously, making for a more seamless user experience.
  2. Increased Availability: With your files distributed across various servers, there’s less risk of a single point of failure. Your loading icons will always be available, come rain or shine.
  3. Reduced Load on Origin Server: Spreading the delivery of your content across multiple servers takes the strain off your original server. This helps not only to deliver the loading icons faster but also improves the overall performance of your website.
  4. Enhanced Security: CDNs often come with built-in security features to protect your content from threats like DDoS attacks.
  5. Scalability: If your website suddenly experiences a surge in traffic, a CDN can handle the increased load without crashing your website or slowing down the display of your loading icon.

How to Implement CDN for Your Loading Icons

  1. Choose a CDN Provider: There are numerous CDN providers out there, each with its own set of features and pricing plans. Pick one that suits your needs and budget.
  2. Upload Your Assets: Once you’ve chosen a provider, the next step is to upload your website assets, including your loading icons, to the CDN.
  3. Update Your Website: You’ll need to adjust the URLs of your loading icons in your website’s code to point to the CDN. This often involves just a simple string replacement in your HTML, CSS, or JavaScript files.
  4. Test: Before going live, test your website to make sure everything is running smoothly and the CDN is serving your loading icons correctly.

Using a CDN can dramatically improve the speed and reliability of your loading icons, which in turn enhances user experience and can contribute to better SEO rankings. If you’re serious about performance, a CDN is not just “cool” but practically essential.

So, ready to give your website the speed boost it deserves?

Size Matters: Why Optimal Icon Size is Crucial

The Downside of Large File Sizes

  1. Slower Load Times: Larger files take longer to load, causing your website to slow down. This impacts both user experience and SEO rankings.
  2. Increased Data Usage: For mobile users on limited data plans, larger files consume more data, which can be a big turn-off.
  3. Higher Bounce Rates: As mentioned earlier, slower load times lead to higher bounce rates. A visitor is less likely to wait for a page to load if it takes too long.
  4. Server Strain: Larger files require more server resources to load, which can be problematic during high-traffic periods.

The Upside of Optimal File Sizes

  1. Faster Load Times: Smaller files load faster, offering a better user experience and contributing to higher SEO rankings.
  2. Reduced Data Consumption: Smaller files mean less data usage for mobile users.
  3. Lower Bounce Rates: Faster loading can keep visitors engaged, reducing the chance they’ll navigate away from your site.
  4. Less Server Strain: Smaller files mean your server has to do less work, improving overall website performance.

Tips for Achieving Optimal Icon Size

Choose the Right Format

  1. SVG (Scalable Vector Graphics): This is often the best choice for icons because it offers high-quality visuals with a smaller file size.
  2. PNG or JPEG: If you can’t use SVG for some reason, opt for PNG or JPEG and make sure to compress the file.

The Art and Science of File Compression

Why Compression is Essential

File compression is not just a good-to-have feature; it’s a necessity. It shrinks the file size of your images, including your loading icons, which, in turn, helps your website load faster. Quicker load times mean better user experiences and higher SEO rankings.

Types of Image Compression

  1. Lossless: This type of compression reduces the file size without losing any image quality. However, the reduction in size is generally smaller compared to lossy compression.
  2. Lossy: In this method, some image quality is sacrificed for a much smaller file size. However, with the right settings, the quality loss can be negligible to the naked eye.

Popular Tools for File Compression

  1. TinyPNG: This is an easy-to-use, online tool that compresses PNG and JPEG images. Simply drag and drop your files, and it’ll do the work for you.
  2. Optimizilla: Another online tool that offers a preview feature, so you can compare the original and compressed images before downloading.
  3. ImageOptim: If you’re a Mac user, this desktop application can compress your images simply by dragging and dropping.
  4. FileOptimizer: A comprehensive Windows tool that supports multiple formats, including SVG.
  5. GIMP or Photoshop: If you want more control over the compression process, software like GIMP or Photoshop allows you to manually adjust settings.

How to Compress Files Without Losing Quality

  1. Choose the Right Format: Always opt for formats like SVG for icons, as they offer high-quality visuals with small file sizes.
  2. Use the Correct Settings: If you’re using software like Photoshop, you can manually adjust the quality settings. Make sure to find a balance between quality and file size.
  3. Test the Quality: Before finalizing the compressed image, always test it on different screens to ensure it still looks good.
  4. Batch Processing: If you have multiple files to compress, look for tools that allow batch processing to save time.

File compression is an essential practice for any webmaster looking to improve website performance. It’s an easy way to speed up page loading, improve user experience, and boost your SEO rankings. Remember, every kilobyte counts!

Future-Proofing with Retina Optimization

The Rise of Retina Displays

Retina displays, made popular by Apple, pack more pixels into a given physical space than standard displays. This results in crisper text, brighter colors, and more detailed images. However, this also means your icons can look blurry or pixelated if not optimized for these high-res screens.

The Double-Edged Sword

The catch-22 here is that higher-quality images, suitable for Retina displays, often come with larger file sizes. Larger file sizes, as we’ve previously discussed, can slow down your website. So how do we break this cycle?

How to Optimize Icons for Retina Displays

  1. Use Vector Graphics: SVGs are scalable, so they look crisp at any size or resolution. This makes them an ideal choice for icons.
  2. High-Resolution Raster Images: If you’re using PNGs or JPEGs, consider creating a version that’s two times larger than the standard size. You can then scale it down to the original dimensions using CSS.
  3. CSS Media Queries: Use media queries to serve different images based on the device’s capabilities. This way, Retina users get the high-res image, while others get the standard version.
  4. Icon Fonts: These are another scalable option that work well on Retina displays.
  5. Testing: Don’t forget to test how your icons look on actual Retina displays as well as standard screens to ensure you’ve struck the right balance.

A Few Useful Tools

  1. Retina.js: A simple script that automatically swaps out standard images for high-res versions on Retina displays.
  2. Picturefill: A polyfill that mimics the HTML5 picture element behavior, allowing you to define multiple sources for an image.
  3. Adobe Illustrator or Sketch: These design tools offer options to export images that are optimized for Retina displays.

File Size Matters: Balancing Quality and Performance

The Conundrum of High-Quality and File Size

The equation is simple: higher-quality images mean larger file sizes. And as we know, larger files take longer to load, potentially impacting user experience and SEO. However, that doesn’t mean you have to sacrifice quality for speed; you can actually have your cake and eat it too!

Strategies to Minimize Impact on File Size

  1. Image Compression: As discussed before, you can use tools like TinyPNG or Photoshop to compress your high-res images without losing quality. This ensures that even your 2x or 3x images for Retina displays are as lightweight as possible.
  2. Lazy Loading: This technique allows images to load only when they’re about to be displayed on the user’s viewport. This means the browser doesn’t have to load all images when the user first lands on the page, thus improving initial load times.
  3. Adaptive Images: Using adaptive images means the browser chooses from multiple versions of an image, based on the device’s capabilities. A lower-res image could be used for older displays, while the high-res one could be reserved for Retina displays.
  4. Optimize and Serve via CDN: Using a Content Delivery Network can speed up the loading of your images by serving them from the closest geographical location to the user.
  5. Caching: Proper caching strategies mean that once loaded, the high-res images are stored in the user’s browser, thus speeding up future visits.

Tools to Aid in Reducing File Size

  1. Smush.it: This is a WordPress plugin that automatically compresses images upon upload.
  2. Cache Enabler: This is another WordPress plugin that serves up WebP images, which are smaller in size but still high in quality.
  3. Google’s Lighthouse: This is an audit tool that can help you identify images that need to be optimized.


Final Thoughts

Paying attention to the size of your loading icon files is not just a detail; it’s a crucial aspect that can significantly impact your website’s performance. Always opt for the smallest file size that maintains good quality, and your visitors—and search engines—will thank you.

Read also: 10 Best AI Photo Editors

Comprehensive Guide to 3D Models